
SketchUp Pro is a popular 3D modeller known for simple yet professional design tools suited to architecture, interior design, product design, landscaping, and more.
Creating shapes, pushing and pulling surfaces to build in 3D, stretching, copying, and rotating are all standard features that users will be well acquainted with. However, SketchUp Pro has so much to offer that you might not be aware of. Read on to see some useful features included in SketchUp Pro that could change the way you work for the better!
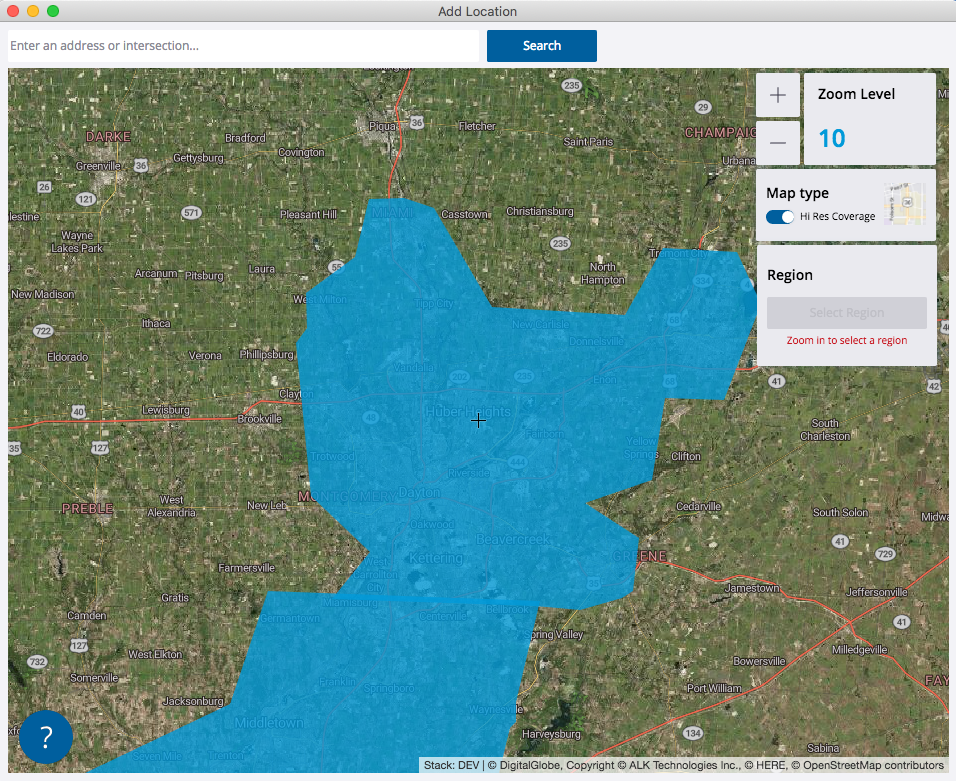
1. Geolocate Models and Build on Existing Terrain
Create buildings on existing ground by applying latitude and longitude coordinates to your project, so SketchUp can simulate where the model would be located. If you want to perform accurate sun and shadow studies to see how light falls throughout the day and year – helped by PreDesign, detailed below – you will need to geolocate your work.
Using a combination of latitude / longitude, time zone, and cardinal orientation (North, South, East, West), you can quickly find effective solutions to efficient design.
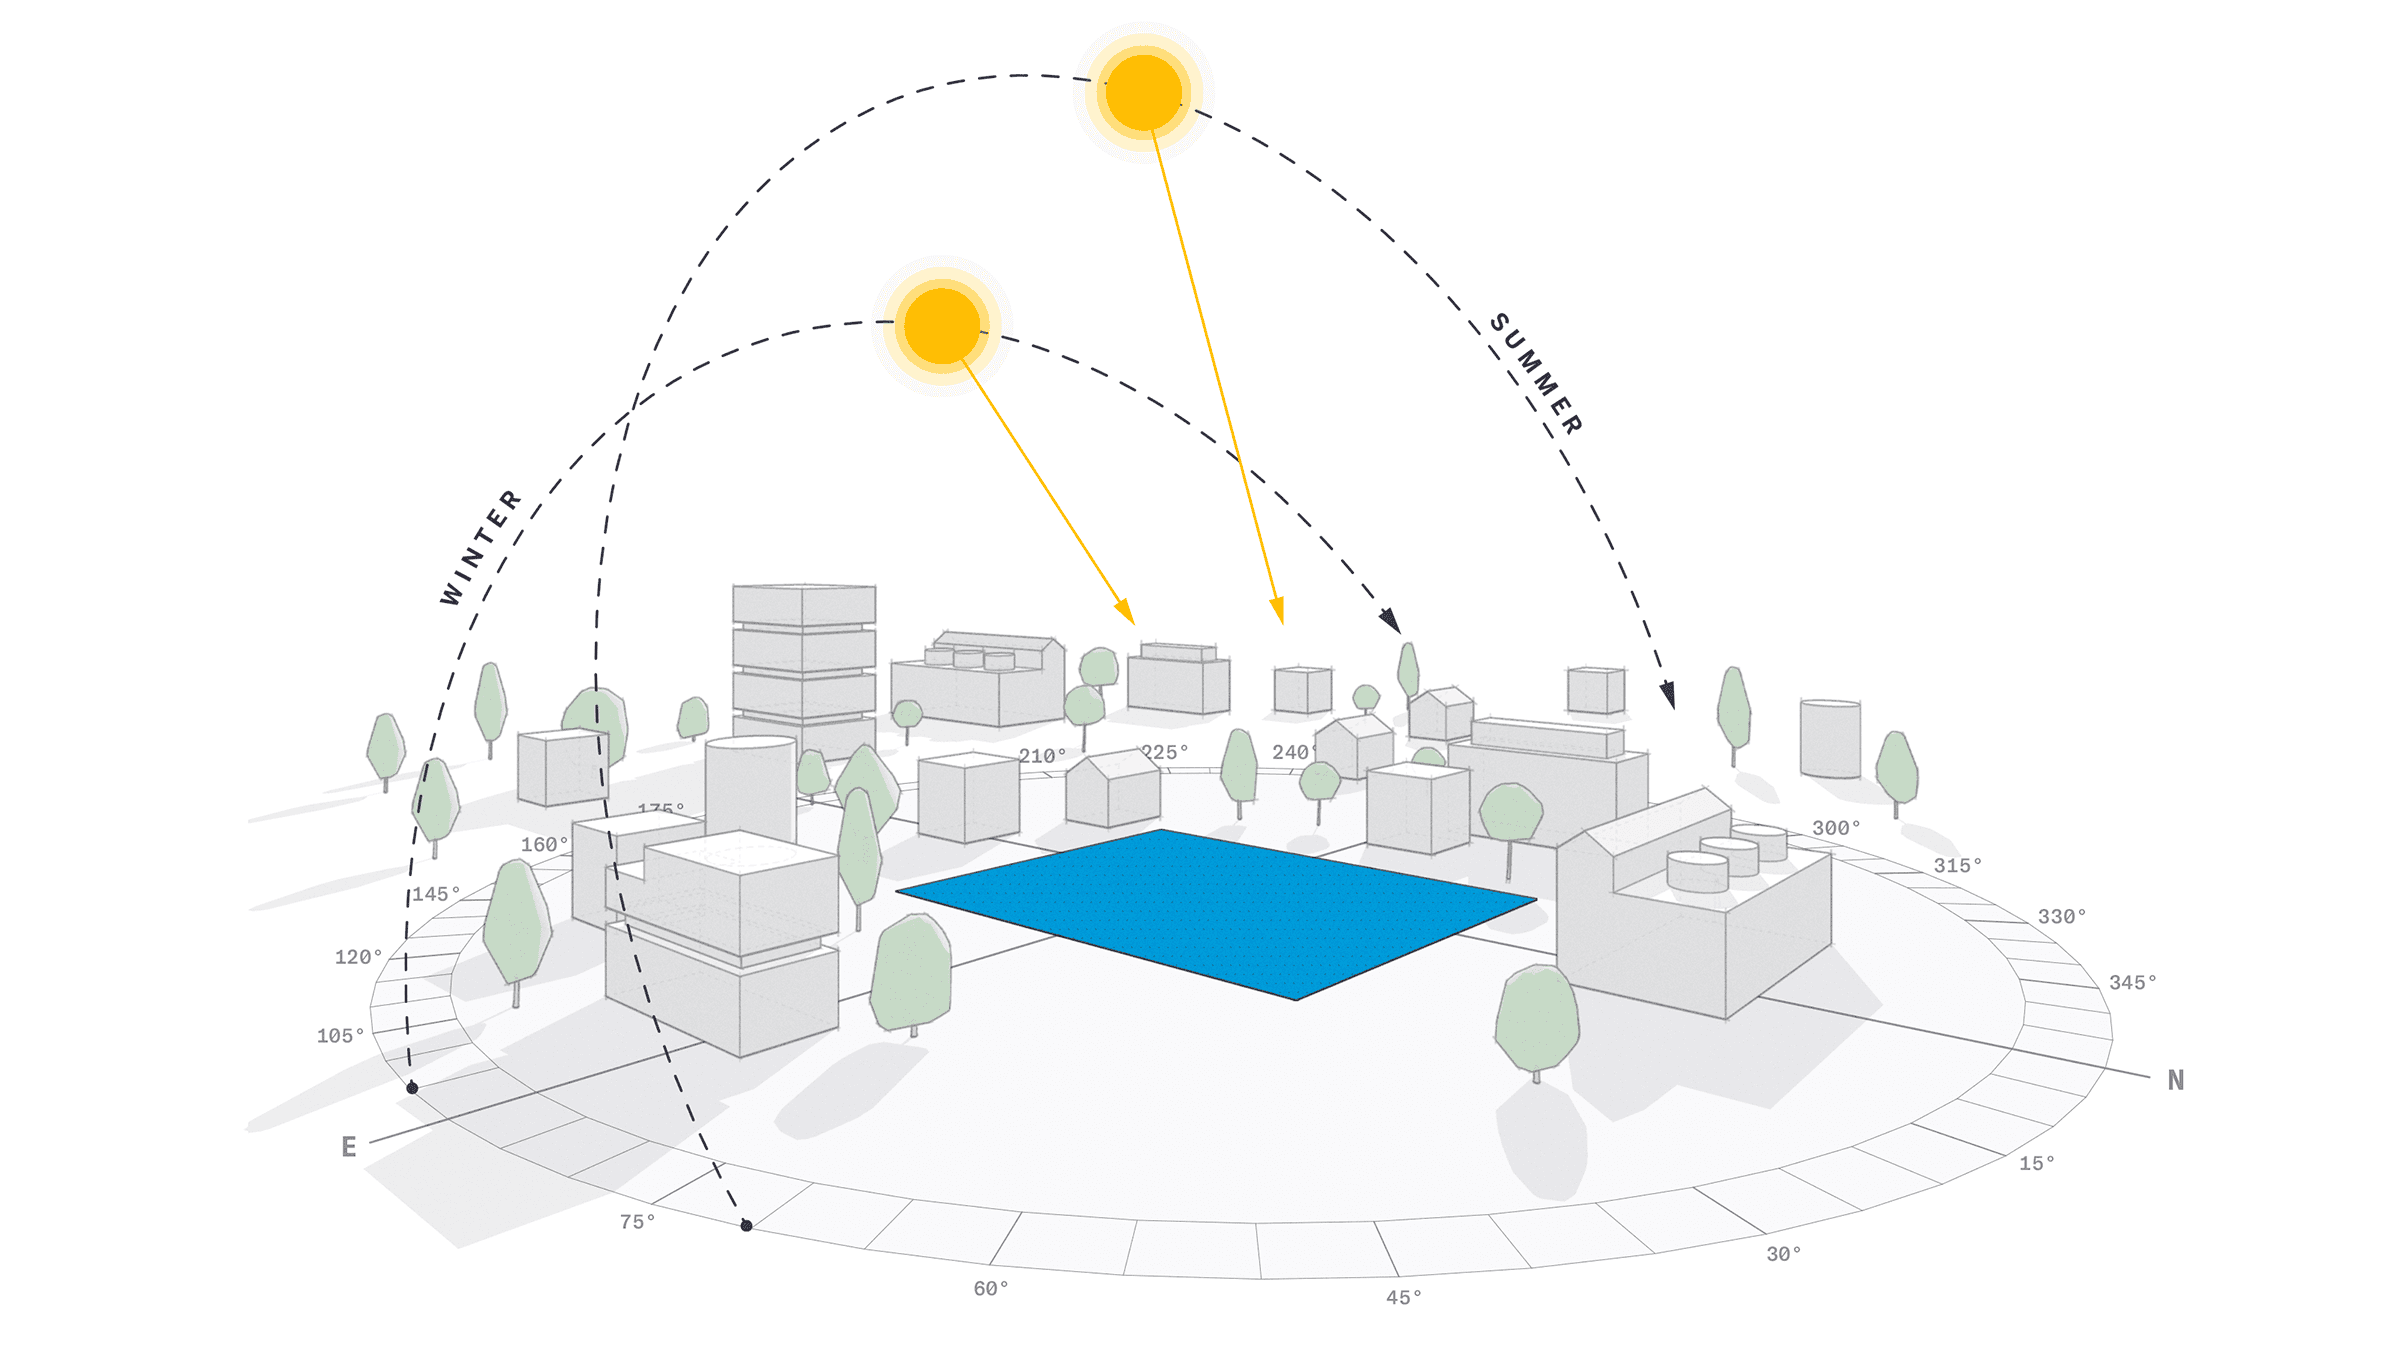
2. Enhance your design research before starting in 3D with PreDesign
PreDesign, simply put, is a tool that is there to enhance your design research before any 3D modelling starts. Create harmoniously with both natural and built environments by laying the right groundwork from the very beginning.
It’s easy too – simply enter a site location and select a building type. Then, you’ll get the valuable data you need to weave contextual insights into your project and get inspired before you launch into 3D.
Being able to explore viable options and only focus on feasible approaches means useful content is generated quickly, and revisiting work to make corrections can be avoided.
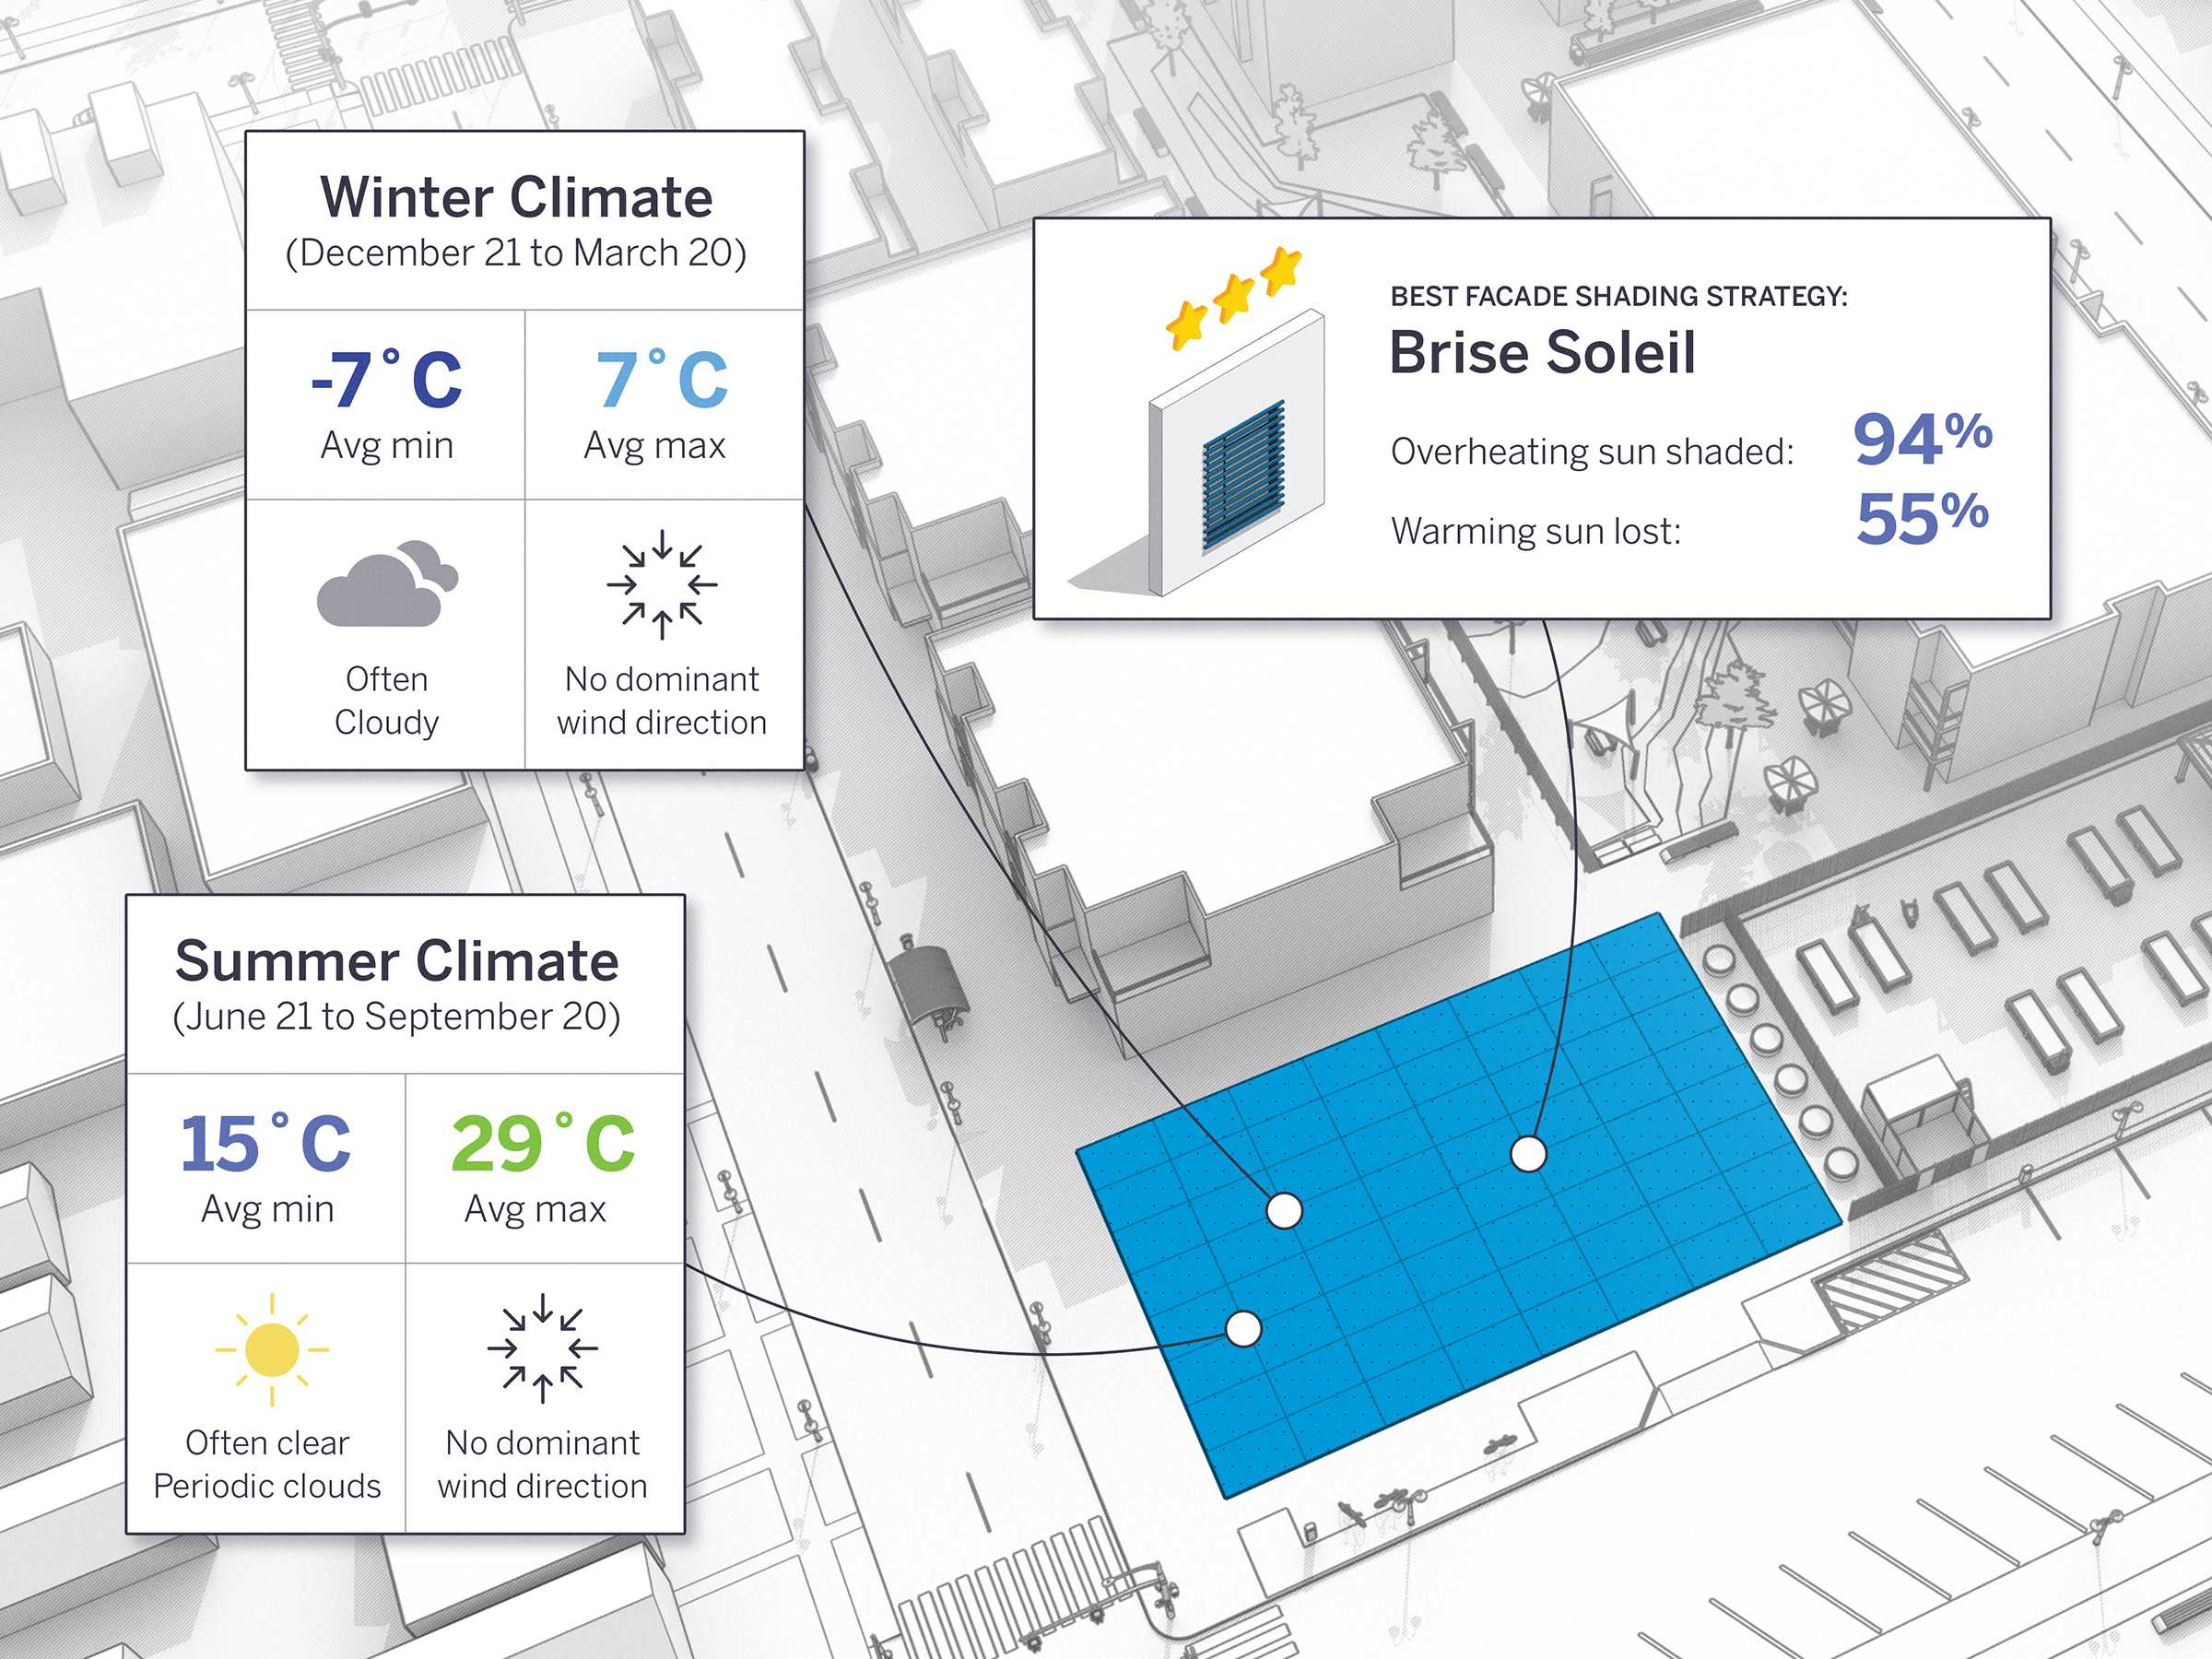
With PreDesign, you can make a clear case to colleagues and clients by having all the graphics and talking points regarding climate factors to hand.
The most effective shading strategies can be quickly identified as you explore trade-offs for increased glazing on building faces.
Be inspired when it comes to allowing daylight into windows and roof areas, and explore strategies that provide the most value in outdoor spaces.
Connect the dots between the climate and your building type, and arrive at the best architectural design response.
3. Create Organic Shapes
You’ve seen plenty of blocks and angular designs in SketchUp, but did you know that organic shapes come naturally too when you learn to utilise the Follow Me tool?
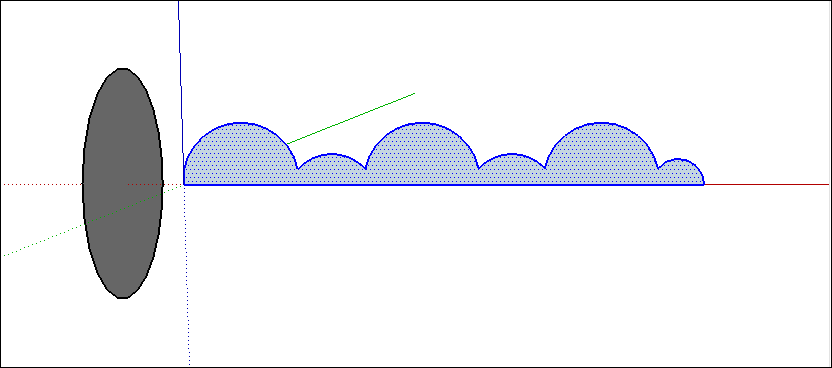
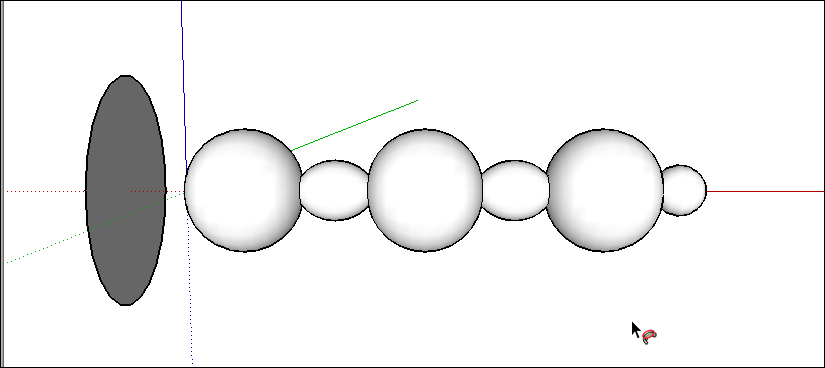
The selected shape above is transformed into 3D by using the Follow Me tool to ‘spin’ it around he path of the circle on the left.

The Follow Me tool has just one function in that it leads a face along a path to create a 3D shape, but it has a variety of purposes. Automatically extruding a profile or creating a lathed object is easy with Follow Me, and is especially useful for finishing details that follow a perimeter such as guttering or coving, as well as curved objects like bowls and vases.
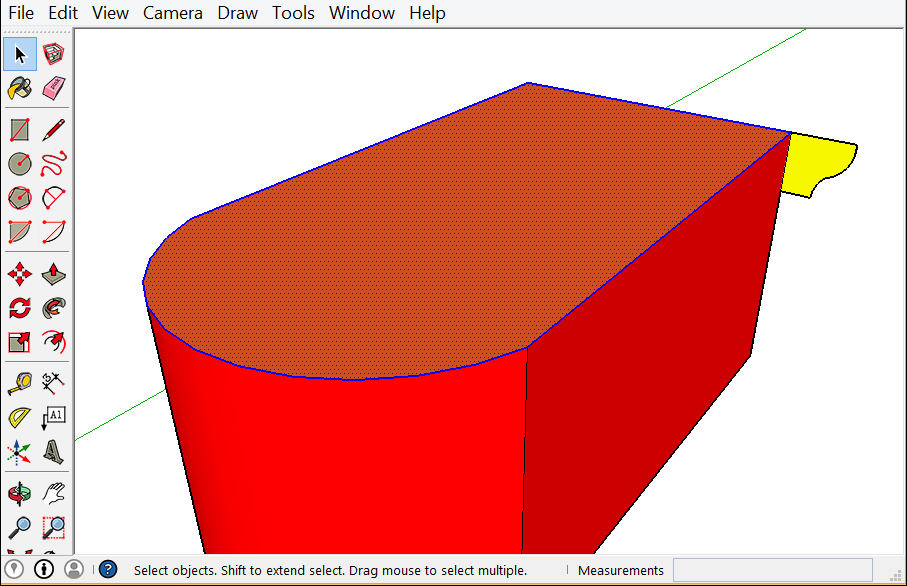
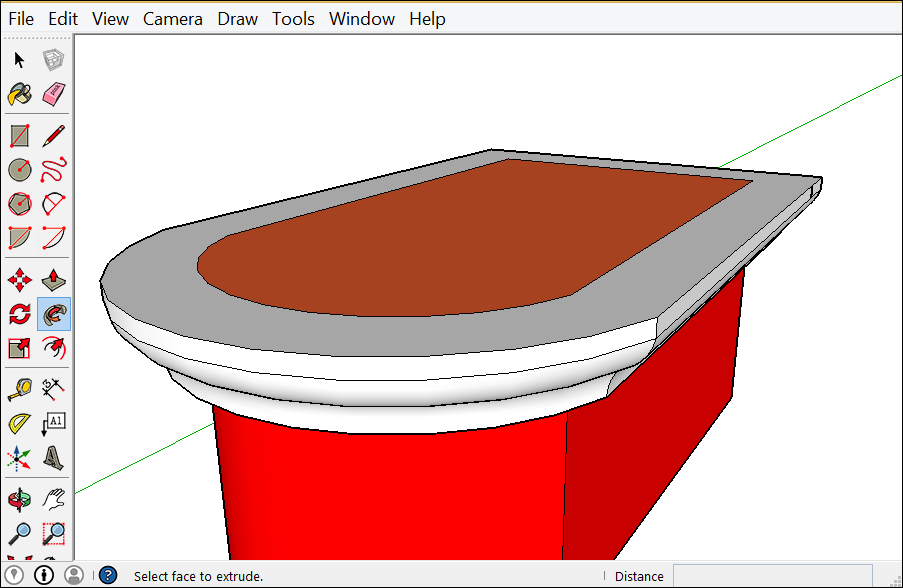
The yellow shape above is pulled along the top edge of the red shape to create an automatically extruded 3D object.
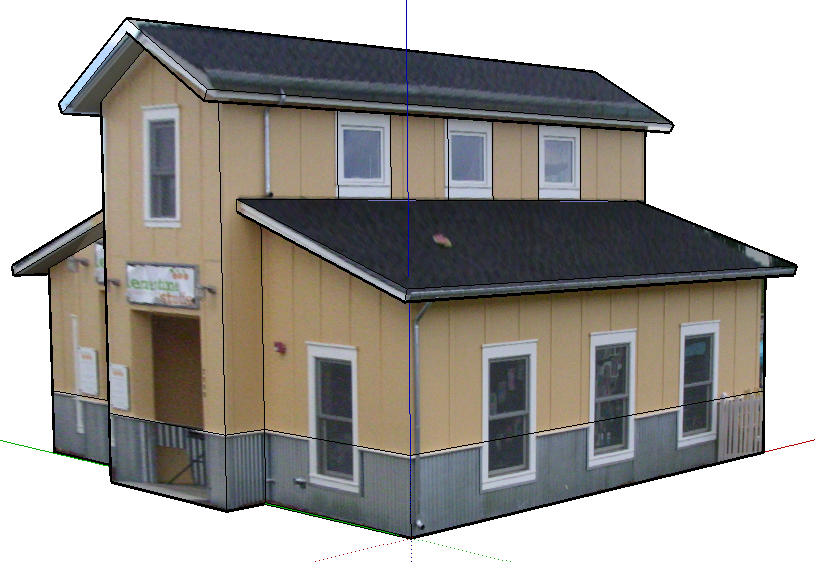
4. Match a Photo to a Model (and Vice Versa)
If you have a model of an existing structure, did you know you can apply a photo to it for a more realistic look? Match Photo even helps you to create a model using a photo as a 3D reference!
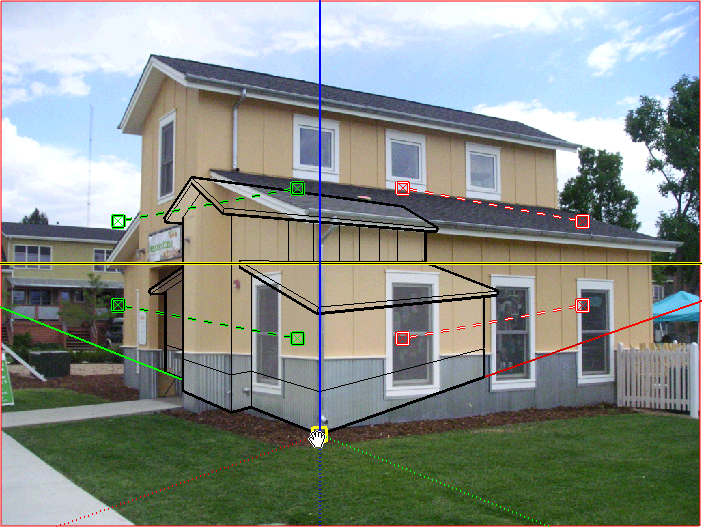
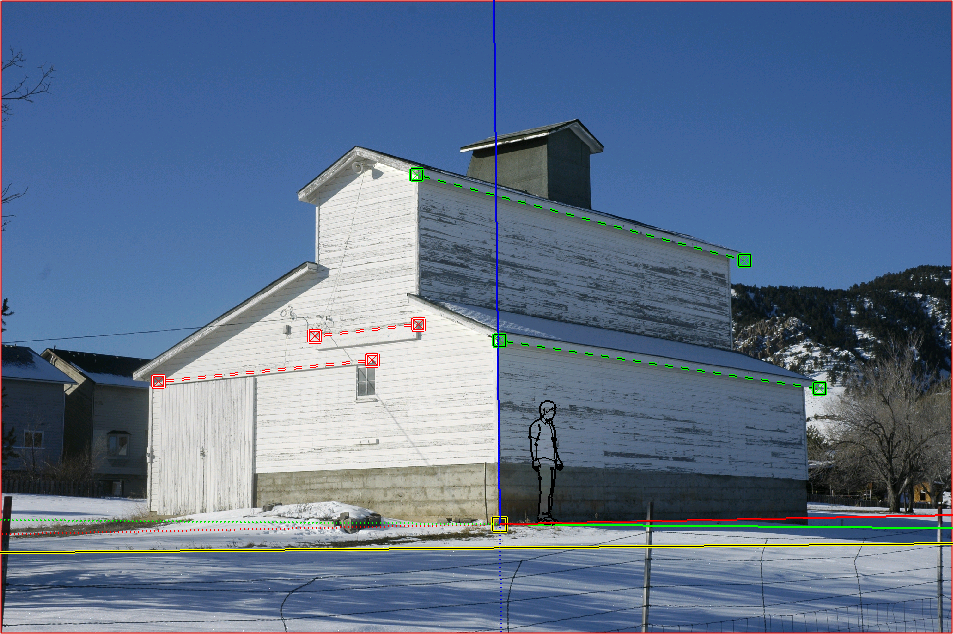
To start, have a model open and go to Camera > Match New Photo. You’ll be able to select the photo you want to use, then see coloured bars that represent the vanishing point (3 on image below), horizon line (4), and axes (5).
Match Photo works best when you have at least one right-angle to work with, clear vanishing points, and images that are not distorted or cropped.
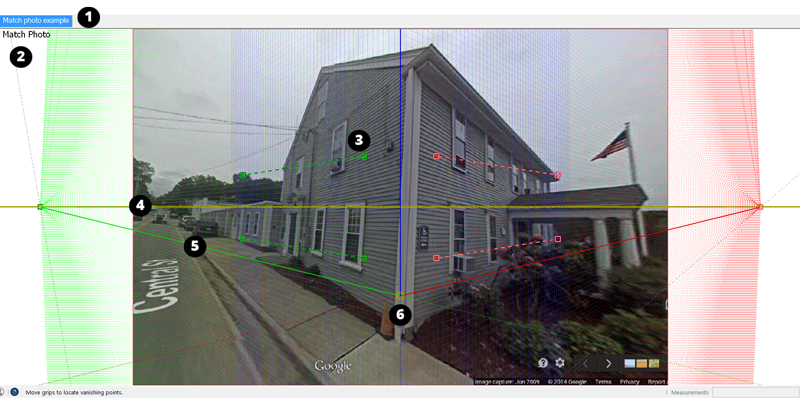
You can then select the type of photo you have in the dialog box that appears, and click & drag the axis origin (6) to match your model to the photo. Use the vanishing point grips to align the image to the model, the blue axis bar to set the scale, and that’s it!
Creating a model from a photo is easy too. Once you have your image set using the vanishing point grips, use the Line Tool to trace edges to create faces.
5. Visualise in the Real World with AR Features
Augmented Reality (AR) is the name given to the ability to view 3D models in a real-world space, and is an effective way to communicate ideas and iterate designs faster. Included with SketchUp Go, these new features are also found in SketchUp Pro!
All you need is a smartphone or tablet that supports AR (and the good news is that most modern tablets and phones from about 2015 onwards do!).
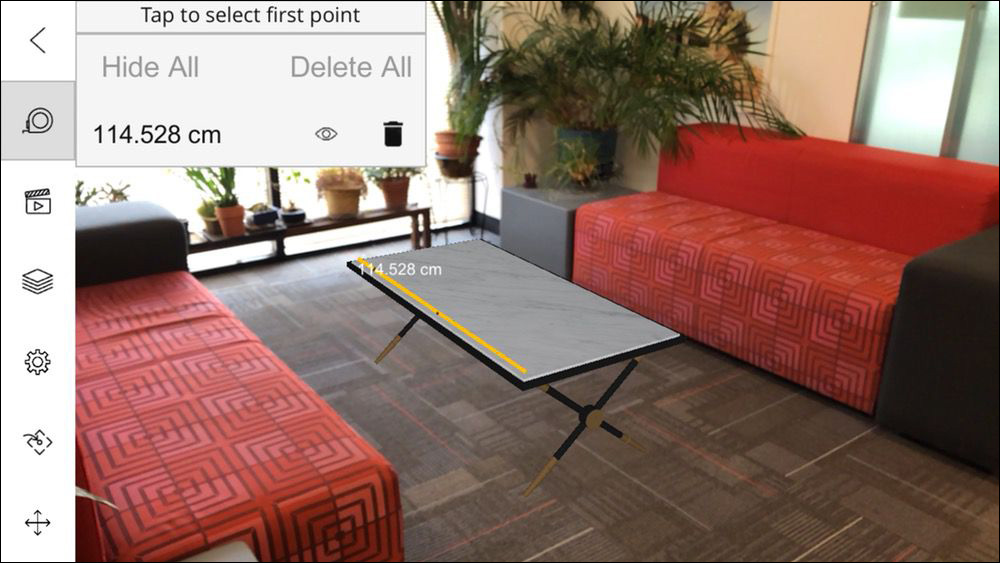
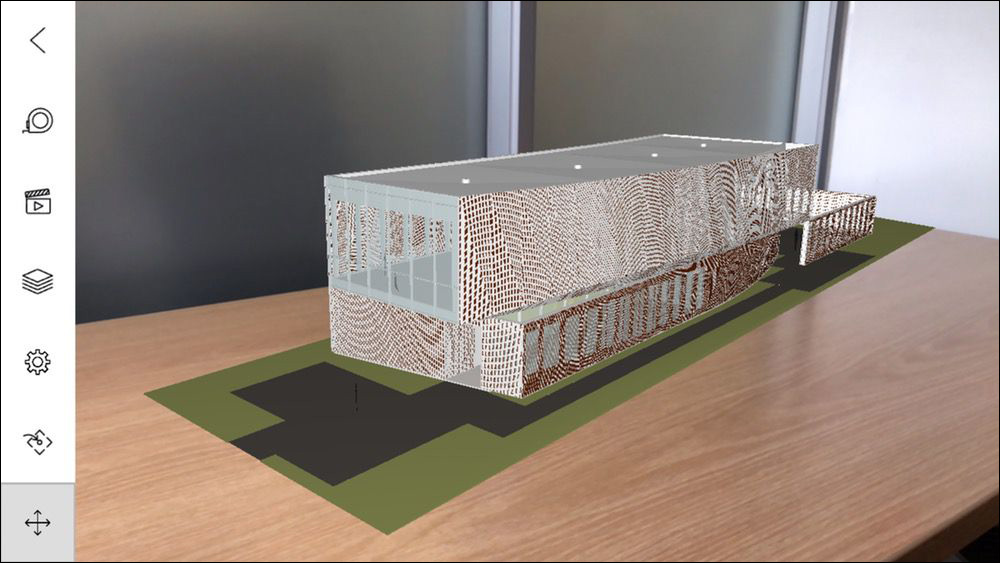
The SketchUp app comes with some example models, or you can view your own models with a paid SketchUp licence. It’s as easy as aiming your camera at a flat surface, such as a floor, to give SketchUp a surface to use as a reference point, and then tapping your model to anchor it where you want it. You can then fine-tune the position, and add dimensions for accuracy.
With Immersive View, step into your model at full scale to experience what the space will really feel like. Models can be scaled and freely navigated, and just as with the SketchUp Pro application, visibility of layers can be toggled on and off. Scenes are functional, and you can even play animations!
The tips above are just a fraction of what you can do with SketchUp Pro! Create design drawings and 2D plans via LayOut, work with your own custom images and textures, share work with clients and colleagues using Trimble Connect, add third-party plugins like photorealistic and realtime renderers, scattering tools, and much more.
Try SketchUp Pro free for 30 days today, and more information is available over on our SketchUp page at CAD Software Direct .com