This week on the Maxwell blog they had a special guest – EPTA Design. The London-based design studio does amazing automotive CGI with Maxwell that we are excited to share with you.
EPTA Design Studio cover all the phases of the preliminary design process (research, styling, virtual modelling, 3D rendering, animation). Their wide-ranging experience combined with a compact studio setting allows them to work in a highly-lean and quality-oriented way, focusing on designs that lead to quality, innovative, and feasible outcomes.
Read the full case study below:
![]()
• Software used: Adobe Photoshop, Rhinoceros, Maxwell.
• Project credits: EPTA Design for WFRIC / Dendrobium motor
The Project
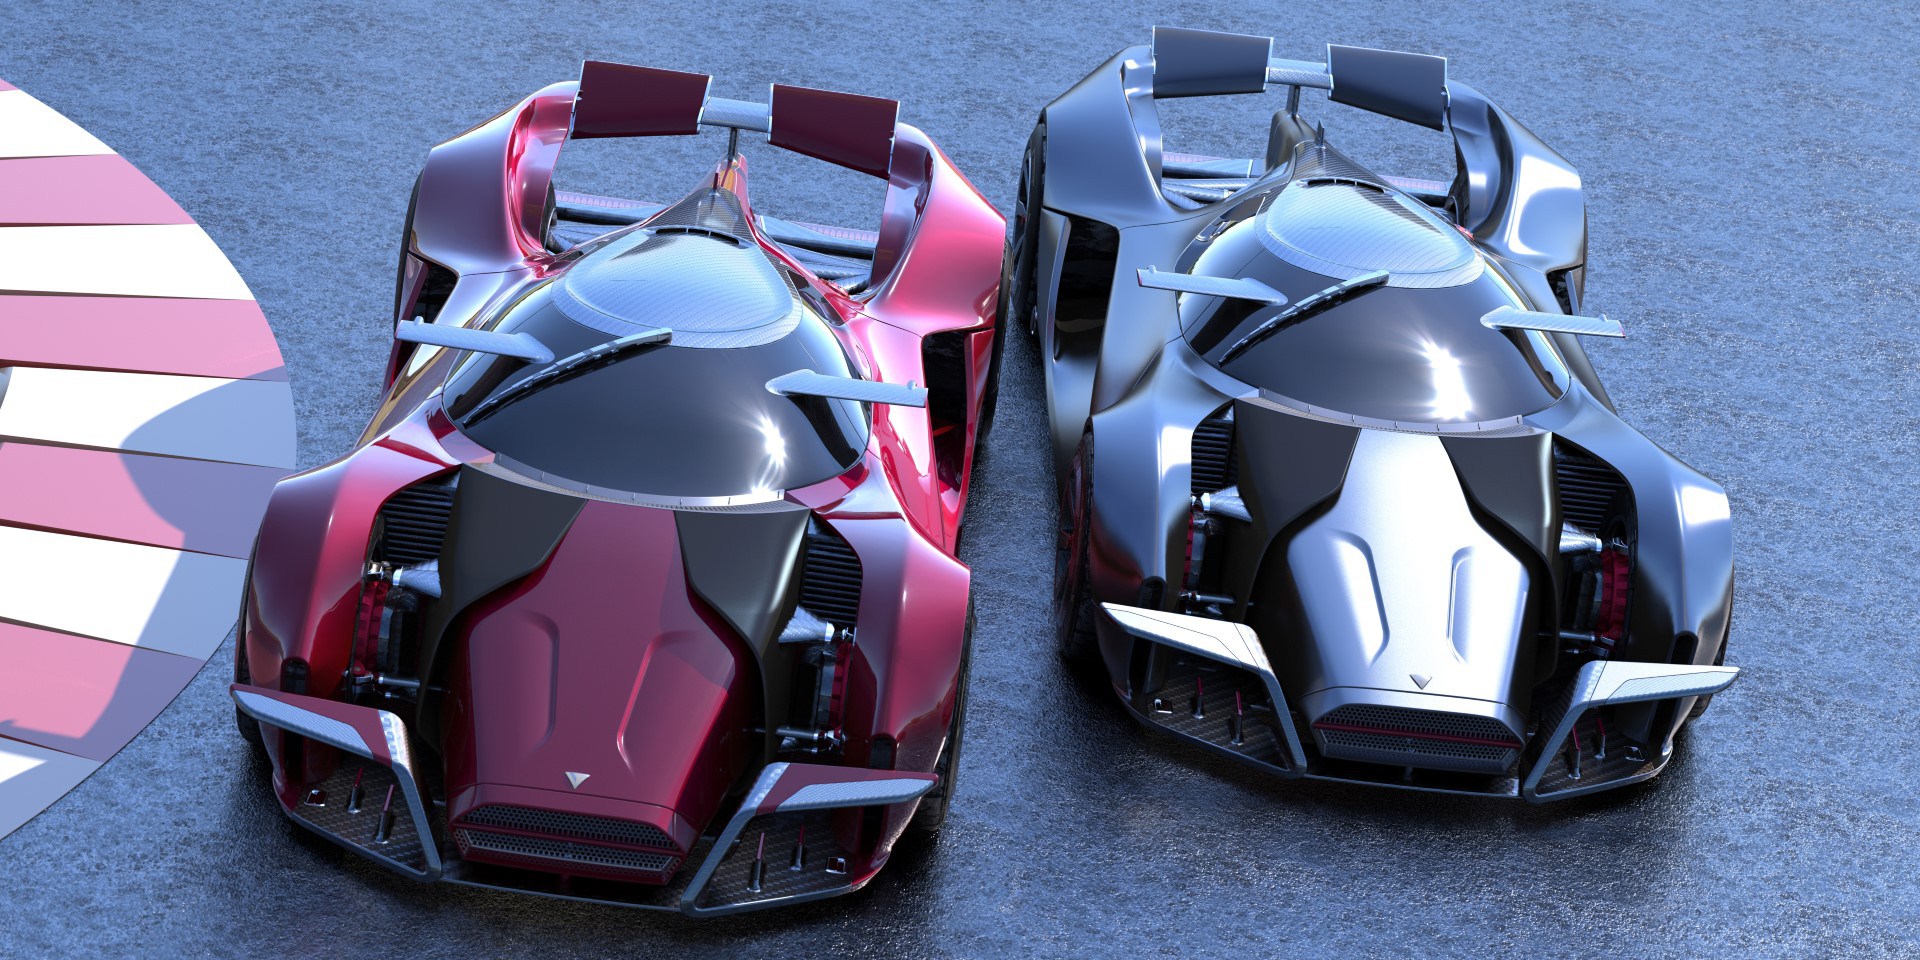
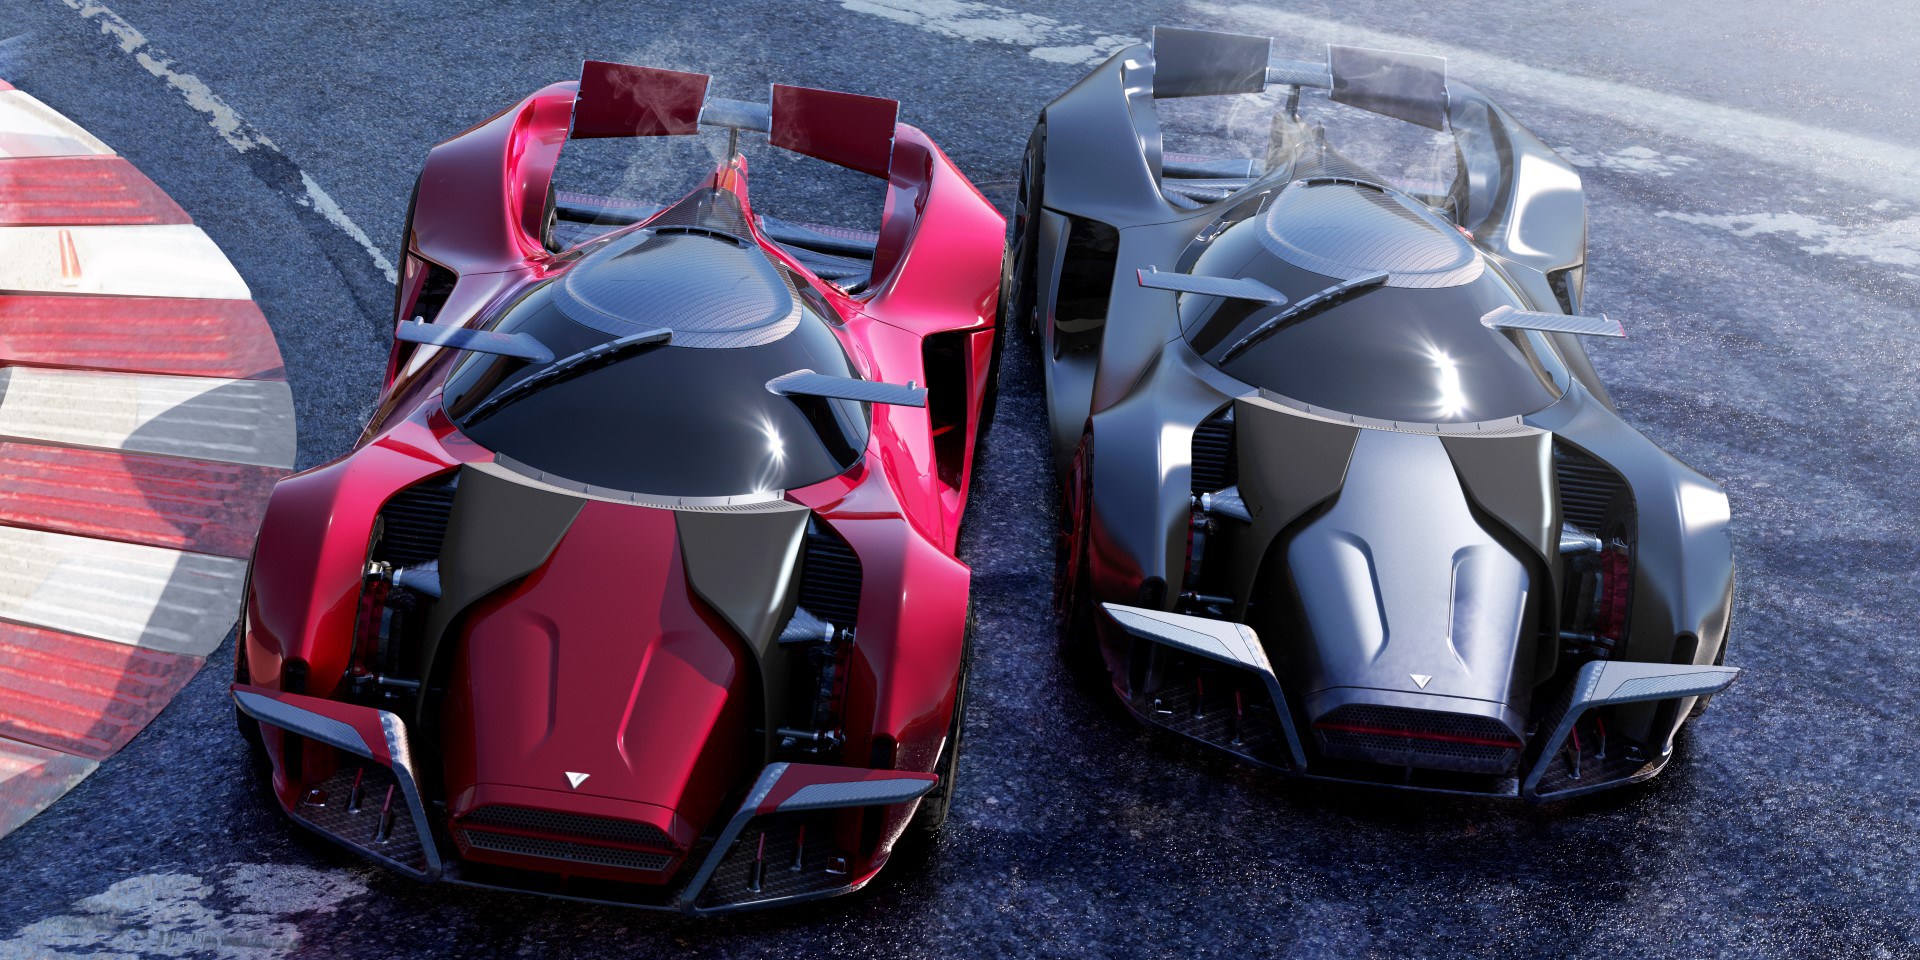
In 2015 at EPTA Design we were asked to develop the style and design of a Hypercar. The project was commissioned by Singapore’s Wong Fong Research and Innovative Center (WFRIC). The first request by the client was to create a “spaceship with wheels”. They were looking for something eye-catching, as well as a reminder of the “key aspects” associated with the company: Singapore balance between technology and nature, flower and machine, a woman‘s shape and sharp line.
“The goal was to achieve a distinctive design different from any other Hypercar.”
It was not a project for production, but rather an open-sculptural one. So, it’s a Hypercar not designed to be driven, just to be admired. Only several months after the presentation of a first-scale model of the final car to the Dendrobium Electric Hypercar SZIDF 2015, the WFRIC created dendrobiummotors.com
Concept and Creative Process

The client was clear about the name from the very beginning of the project: Dendrobim. This is the name of an Orchid in the Singapore area, a beauty symbol that amazes.
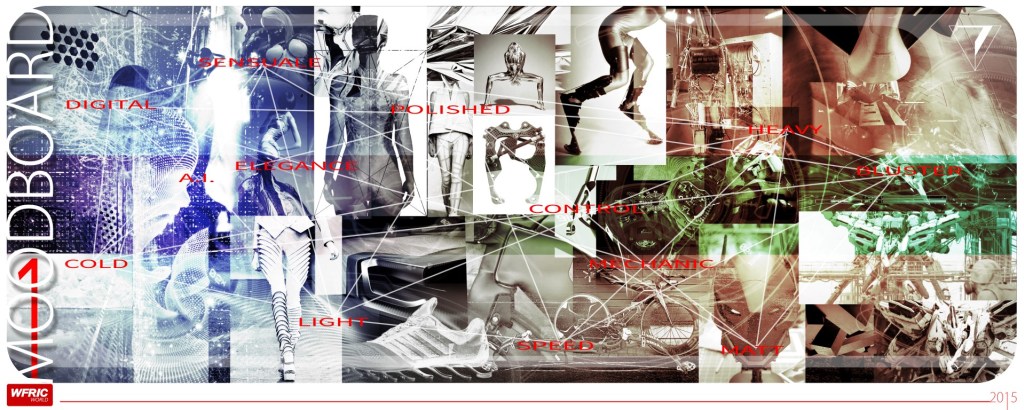
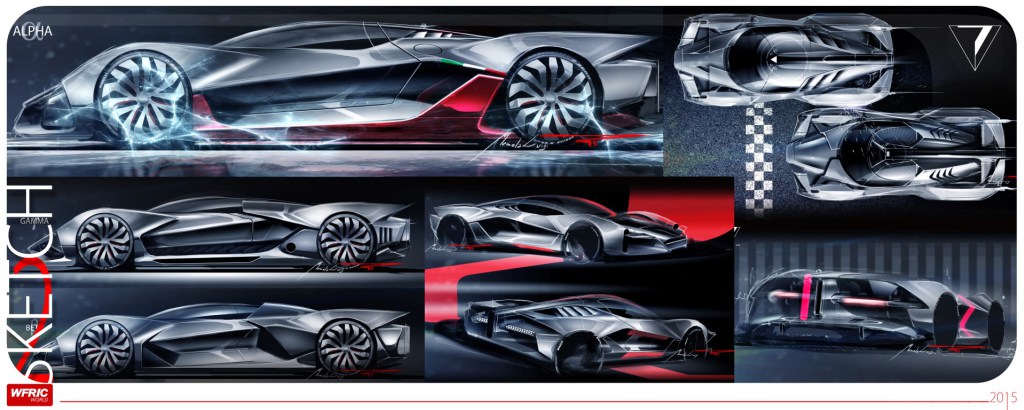
The creative process as a style study, always goes through a research / synthesis phase that takes keywords provided by the client and converts them into images. The moodboard table serves this task! Images from other sectors are used: fashion, architecture, industrial production, design, film, and art in general. With these images hung on the center-style wall, we started to draw.
Greatest Challenge
The most critical part of the project was time. We had little time to present the design, and deliver the 3D file. After a month or so, we mailed the model to Shenzen China. That was followed by a first round of CAD images, approval, and delivery. The final rendering was done later, when we had enough time to refine the model and achieve rendering quality.
Work with Maxwell
EPTA Design deals with design for rather niche sectors, and not for large-scale production. This project is positioned right at the edge, so the goal was to make high-quality realistic renders that look unbelievable.
“The quality had to be exquisite, and Maxwell is the perfect tool to achieve this goal.”

Materials
As an agency EPTA Design also offers the rendering service, but usually, we can sell this service only in conjunction with the design of the product, so we have total control over the graphic choices (materials, colors and surface finishes). We use a lot of Maxwell’s materials available in the Material Gallery. Over time, we have enriched it with some free materials downloaded from the official site and we change them slightly according to the needs of the project.
Lighting
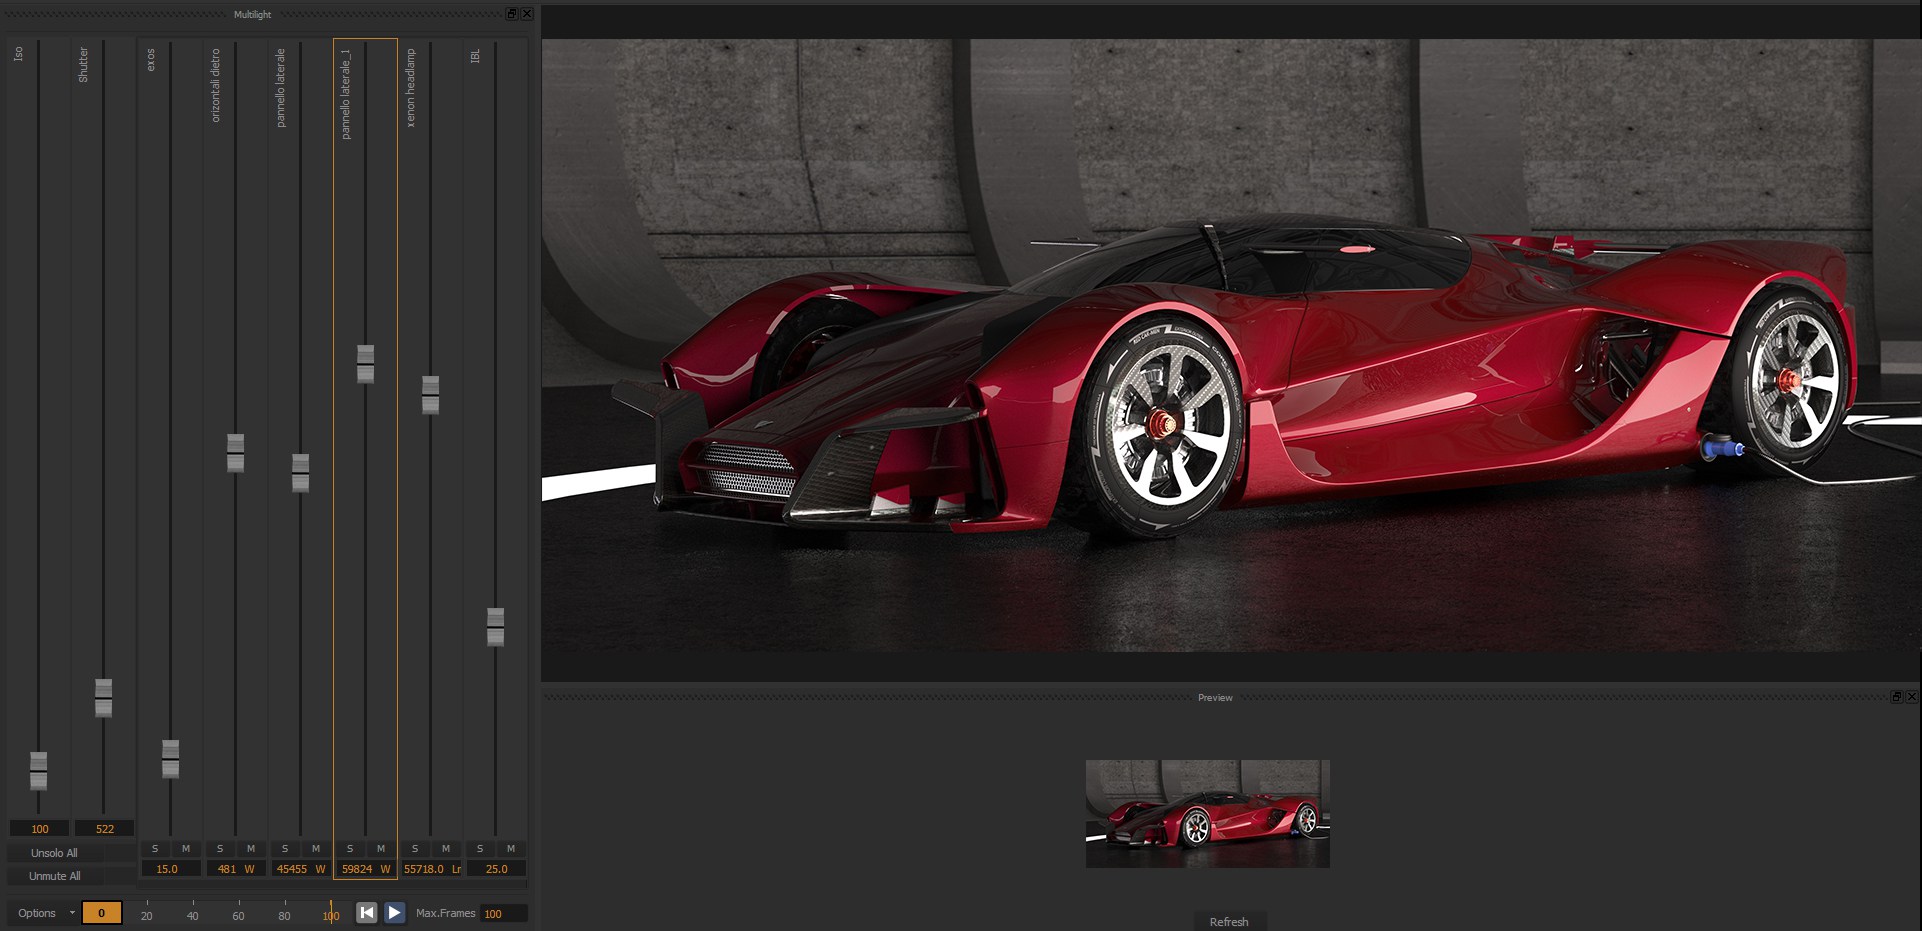
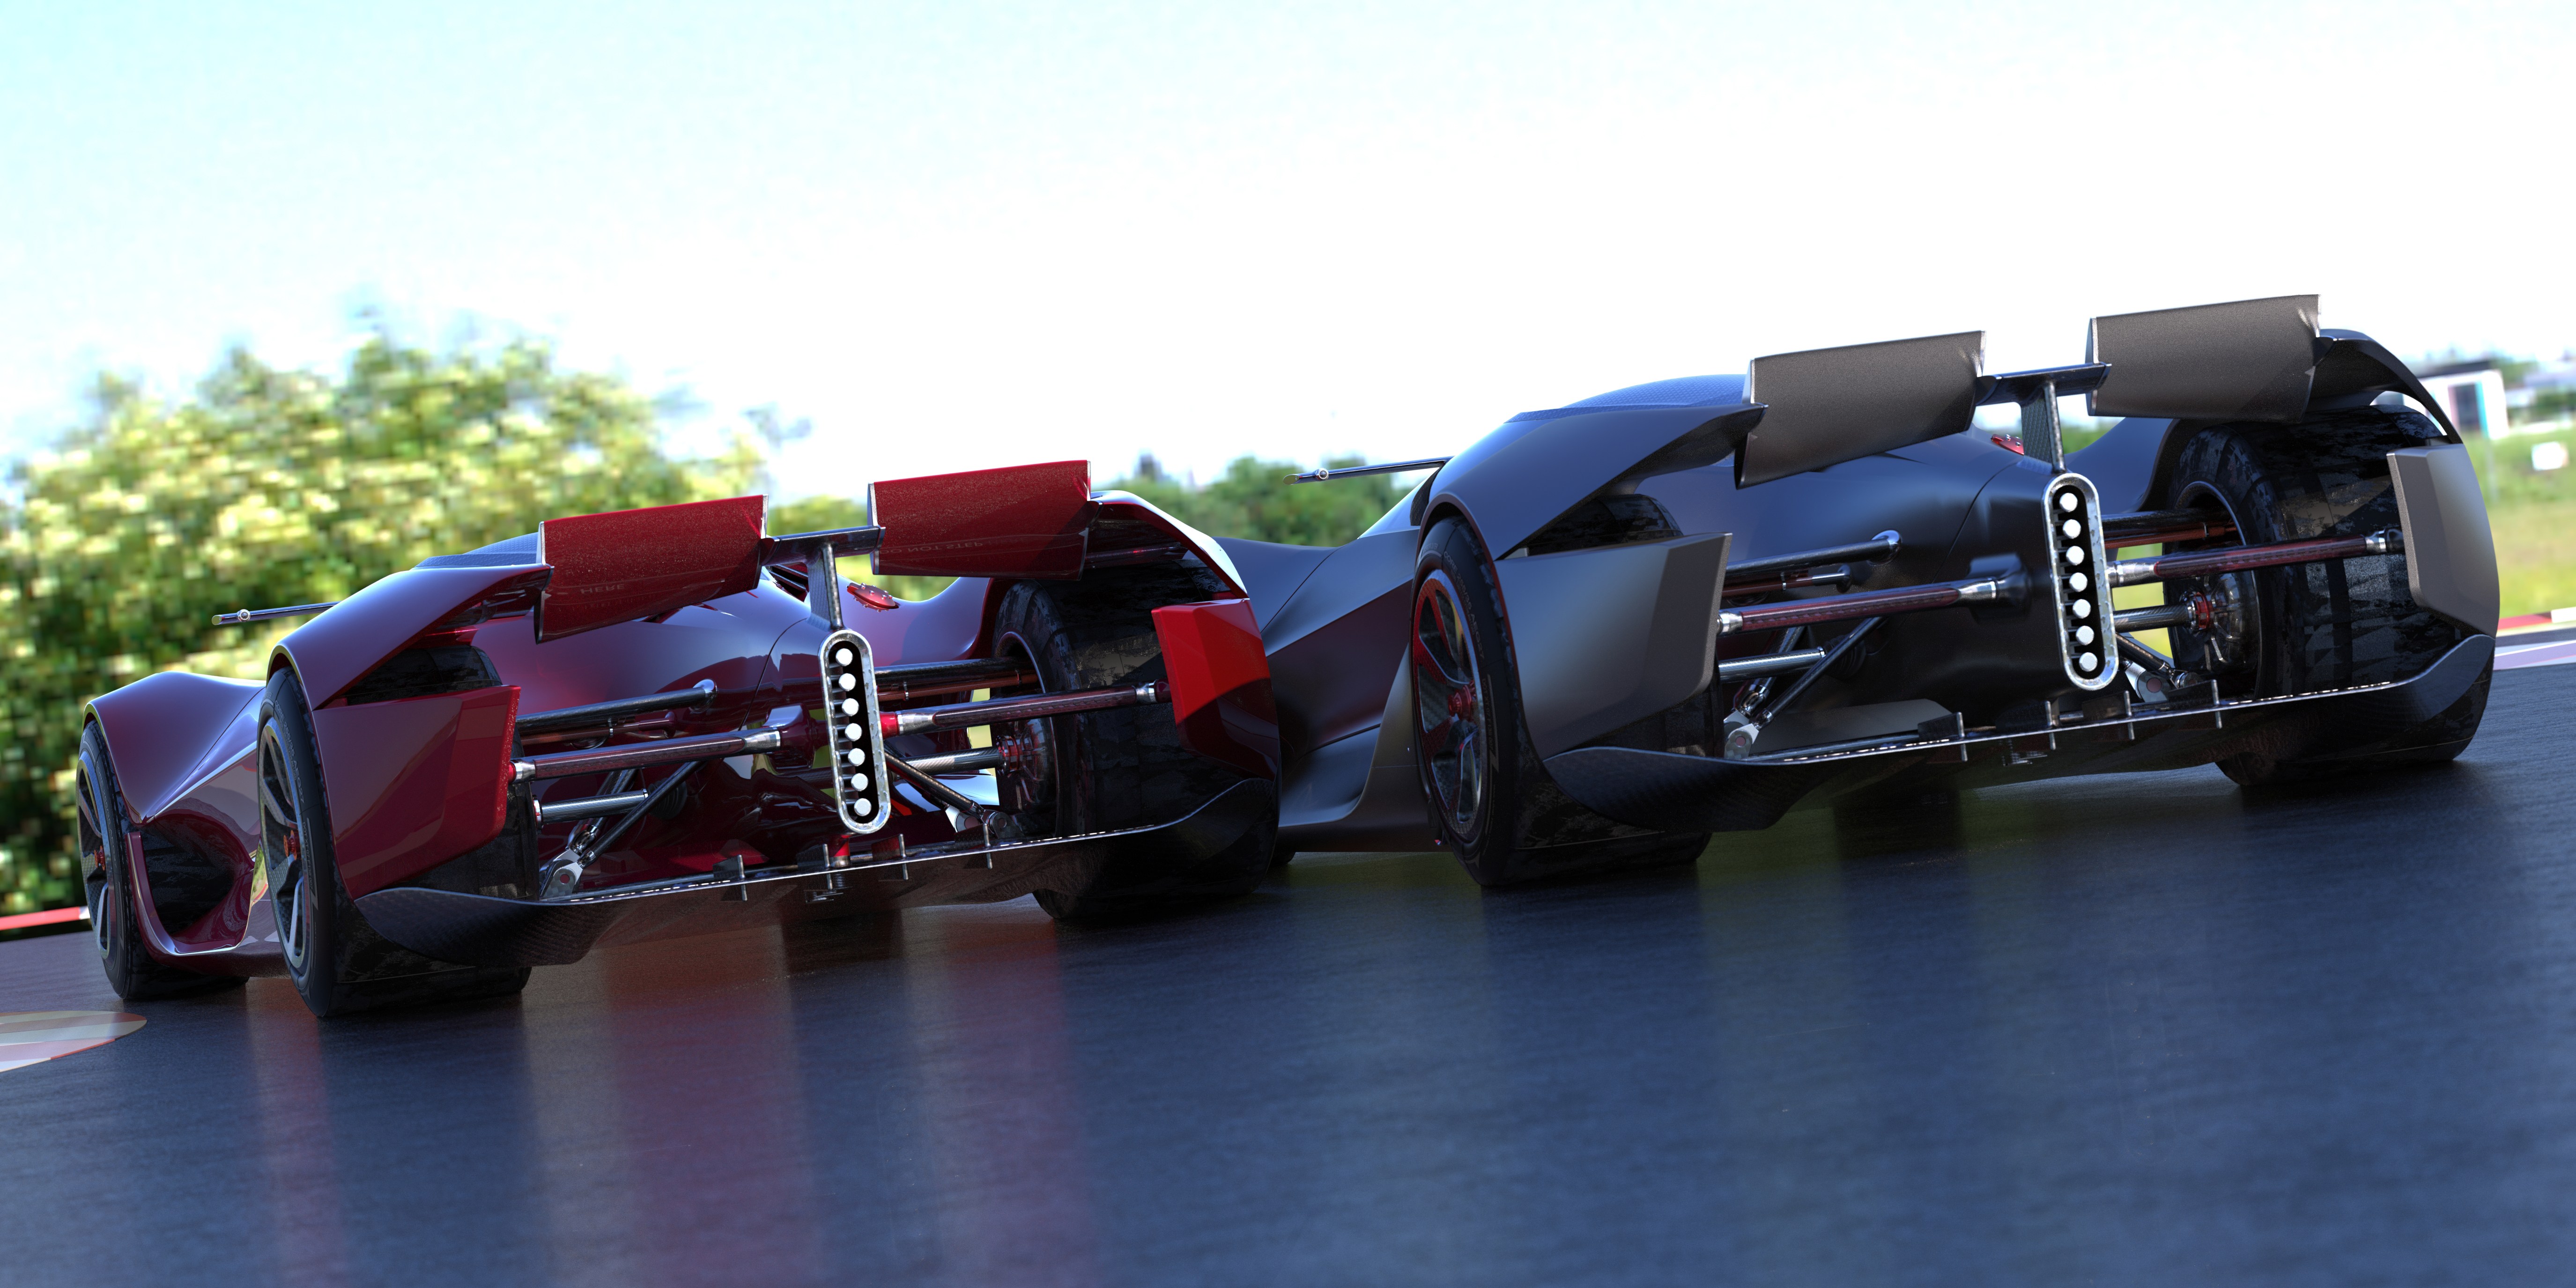
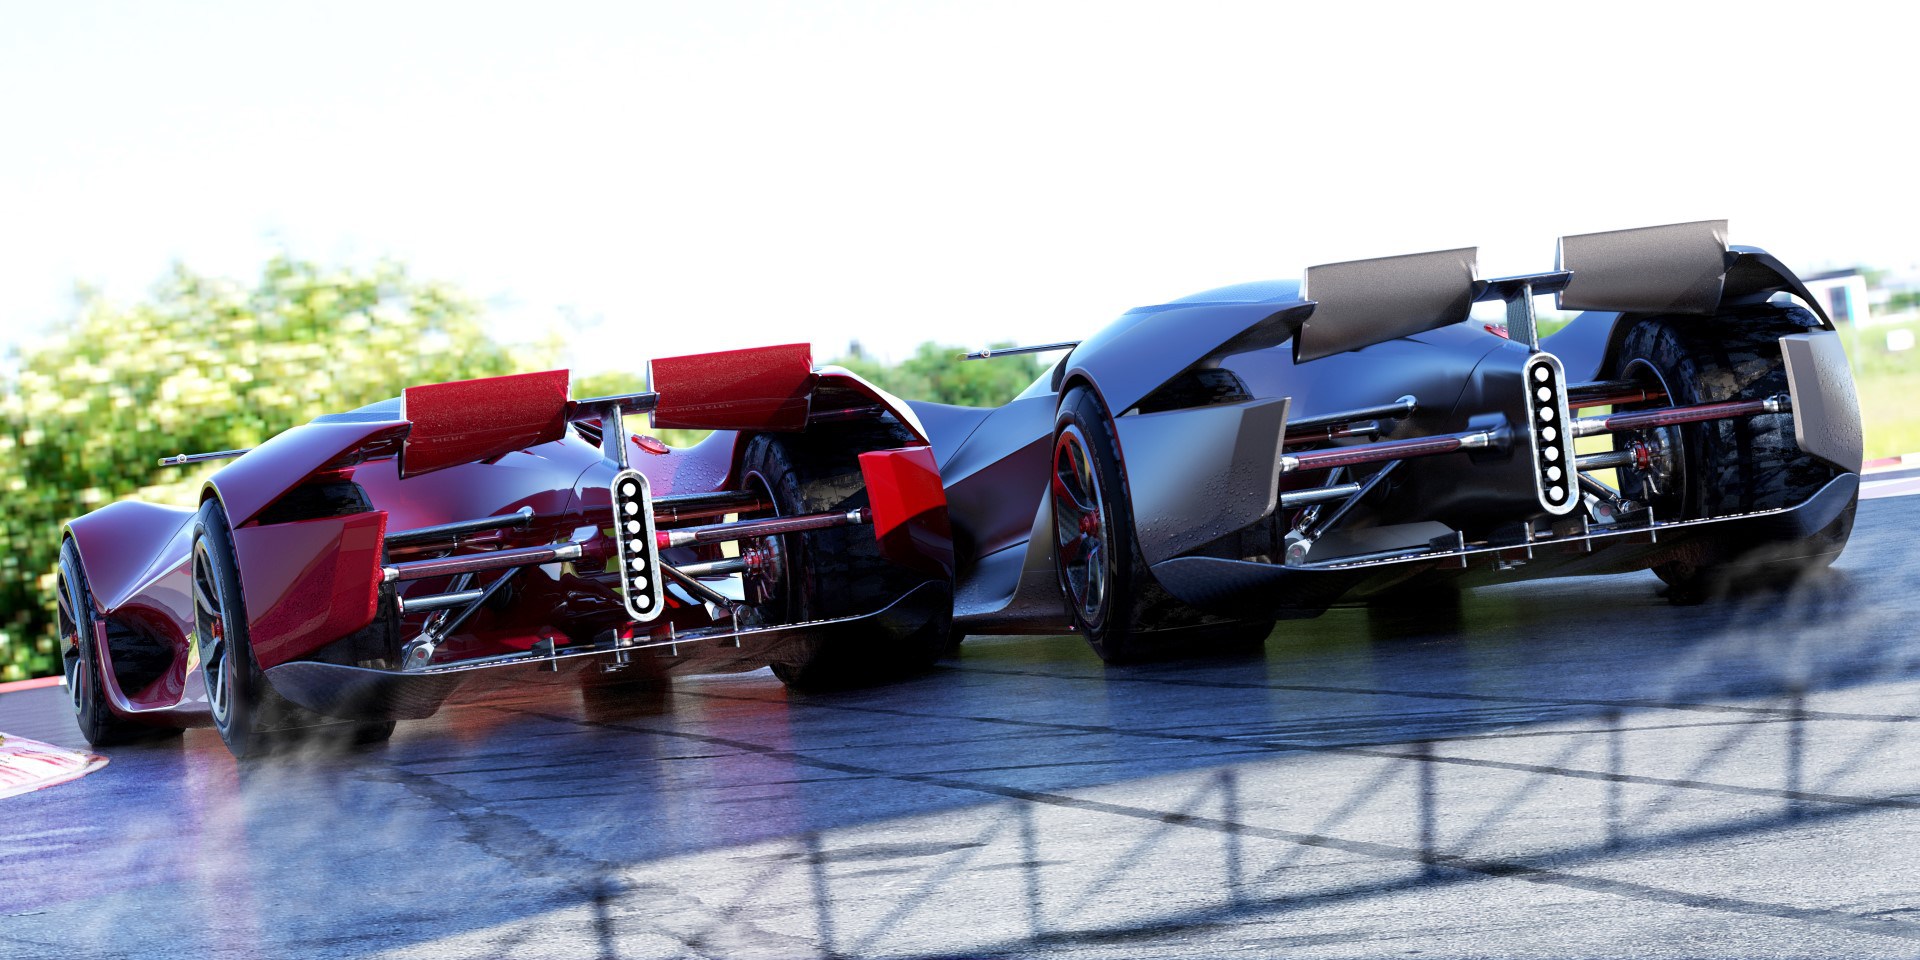
We always present the project in two lighting sets: a photographic and a natural one (natural lighting).
For outside renders, we used the potential of the Sun plus Maxwell’s PhysicalSky combined with an HDRI. In the photographic set, instead of the sky (Sky+Sun) we used only an HDRI (for lighting, color, and reflection) but we added some strategic plans and we assigned the lights from Maxwell’s internal library.
“In both cases, the Multilight system is crucial to light testing and comparison in real time. In addition to communicating forms and materials, it creates a certain degree of emotion to the final image.”
Postproduction
Usually all our renders undergo a post-production process. For example, in the set-up, you have to explain as well as possible the context, while when rendering we try to enhance the object itself.
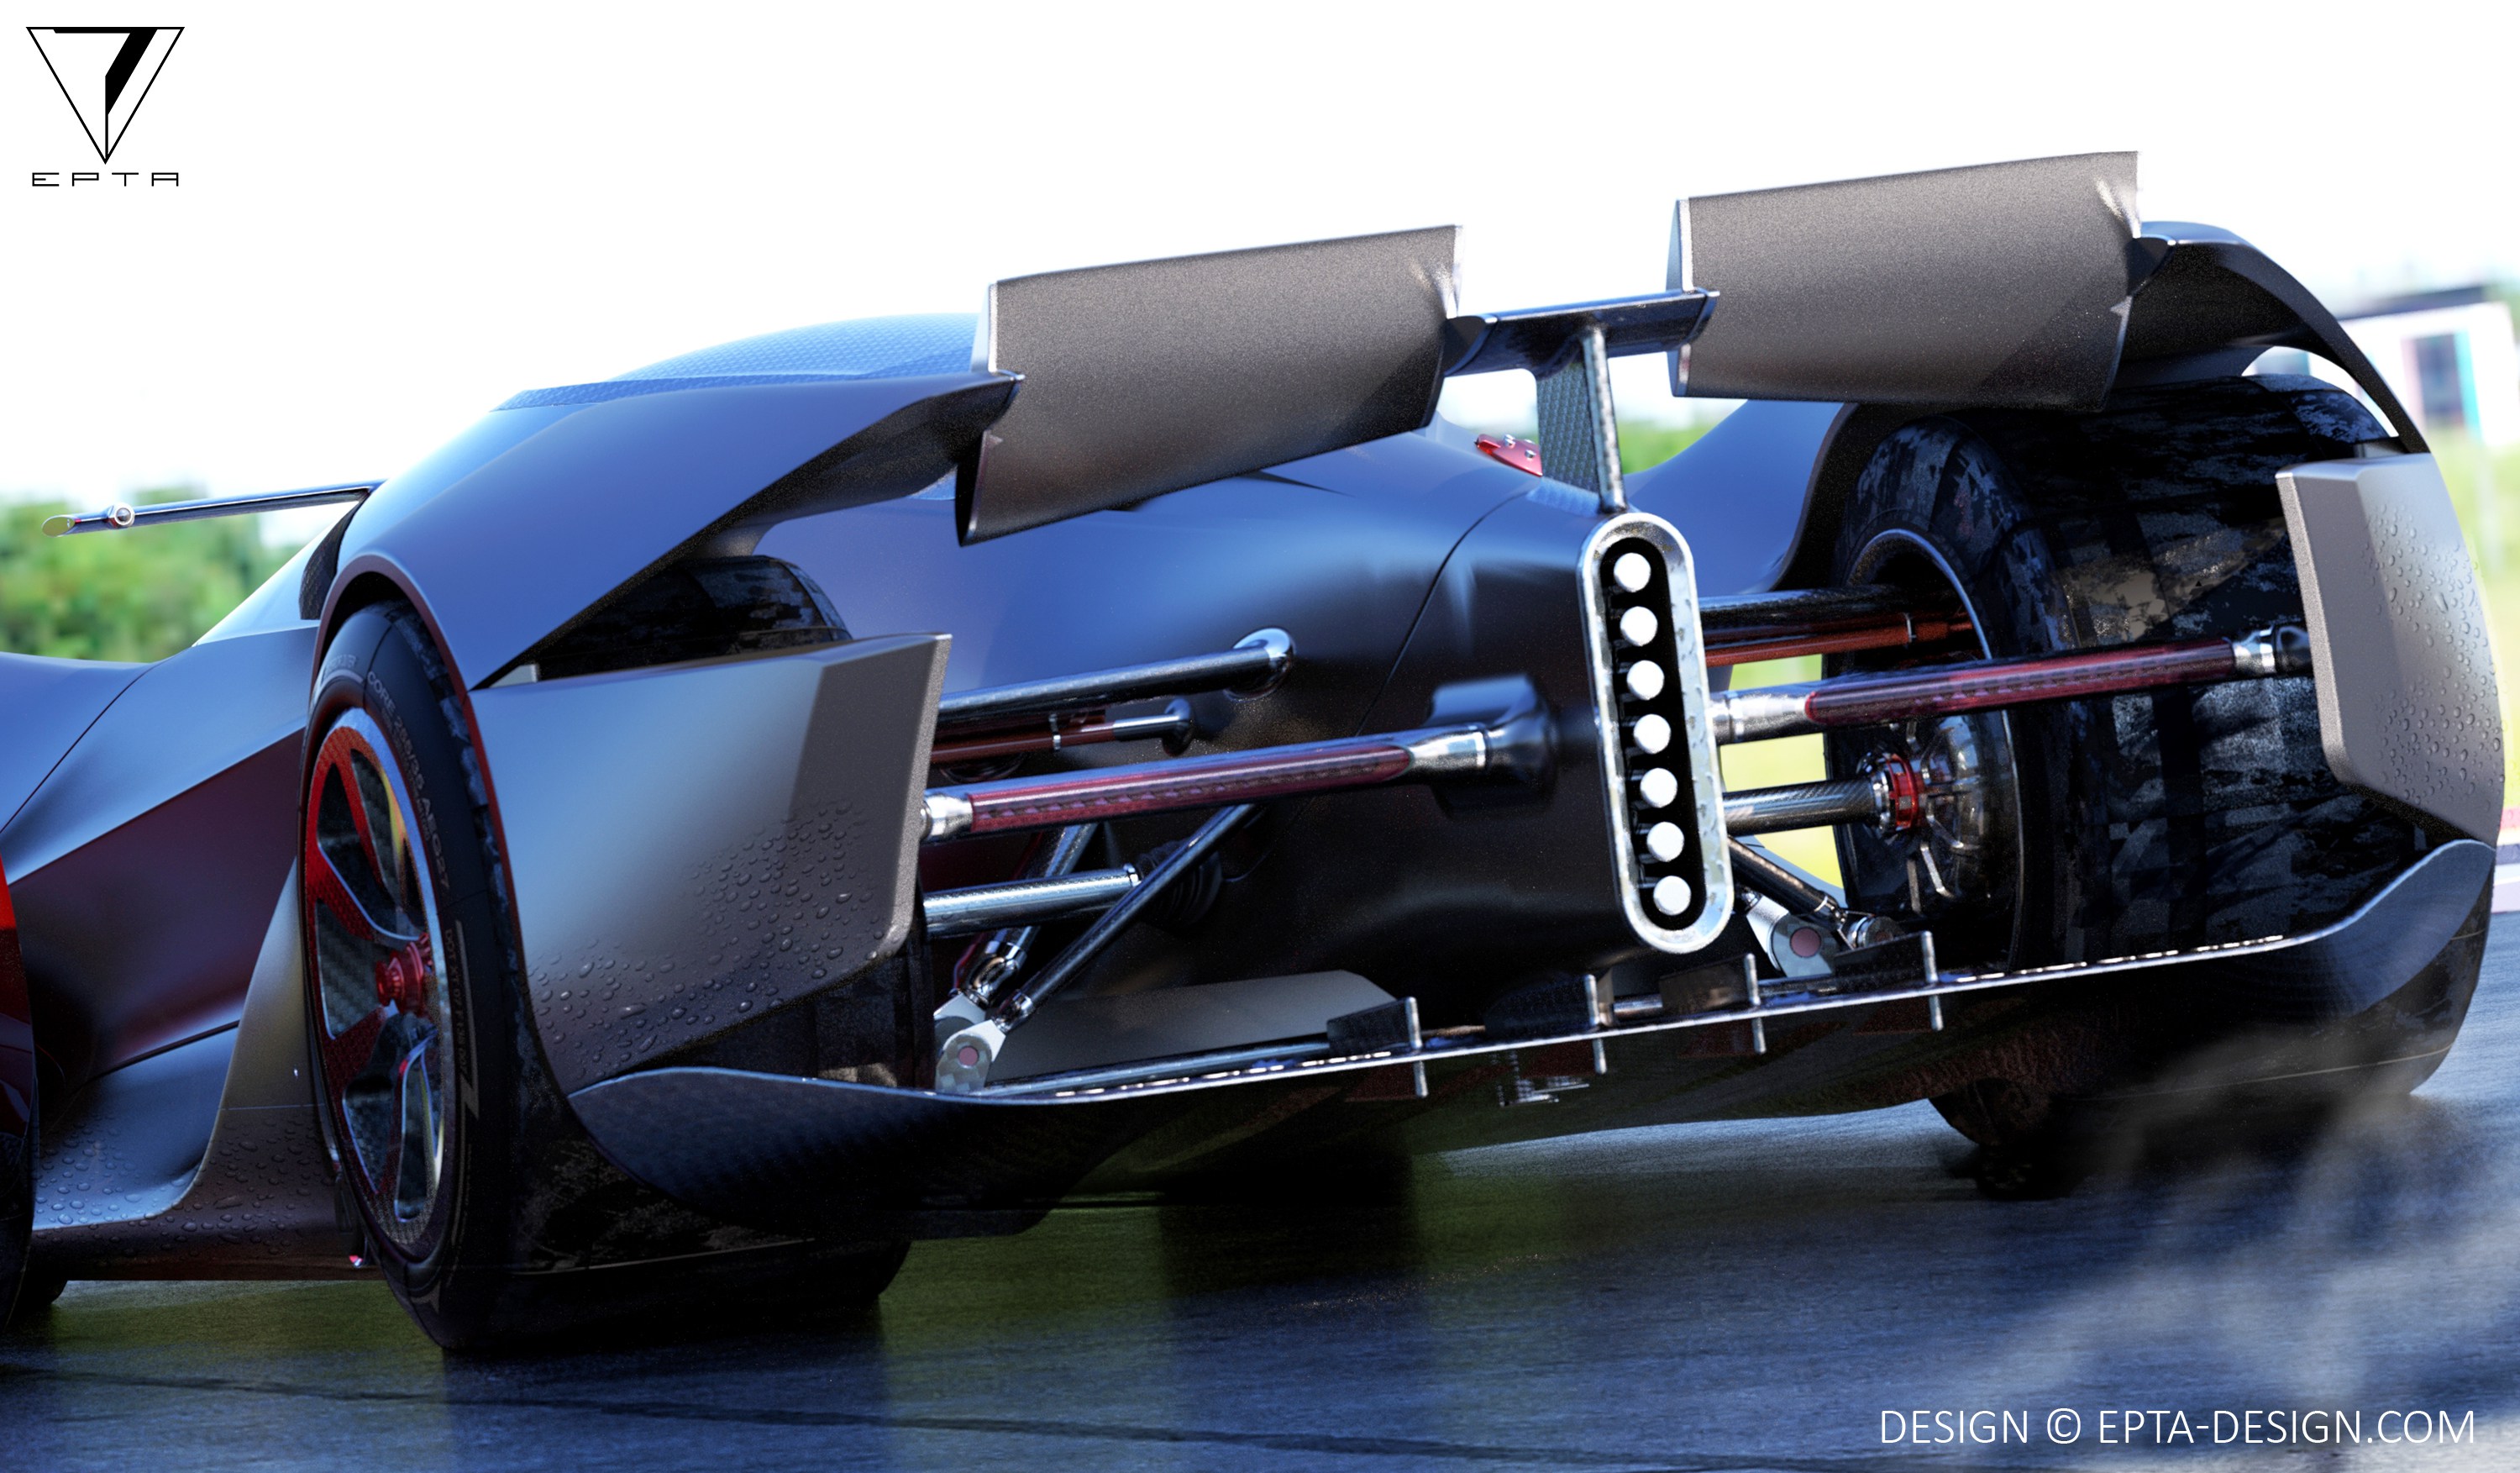
Specifically, for outdoor renders, most of the work is done using HDRI, sky and sun light from machine materials and a “wet asphalt” material. But that’s not enough. To give the idea of running in a circuit, we changed the road (adding chromatic irregularities typical of asphalt with different cracks and types of asphalt, curbs and grass), blurred the wheels and added splashes of water when driving on wet ground.
Apart from these changes, we usually work on the overall image: we adjust saturation because sometimes too saturated colors make the final image less realistic, we add depth using smoke, and bright effects such as camera glows and finally we add shadows of other objects to the main scene.
The Final Piece
We are happy with the final result! The design has been well received even though in the second phase the project it underwent profound changes. Nevertheless, our design images achieved the goal of attracting the attention of the audience!