Getting the right look and feel on a 3D model is incredibly important. Whether you’re communicating with factories or explaining parts to non-technical stakeholders, getting the right colours, appearance, and materials is essential to success.
SOLIDWORKS offers a whole range of visualisation tools across its platform, with basic colours and materials up to full ray-traced renders.
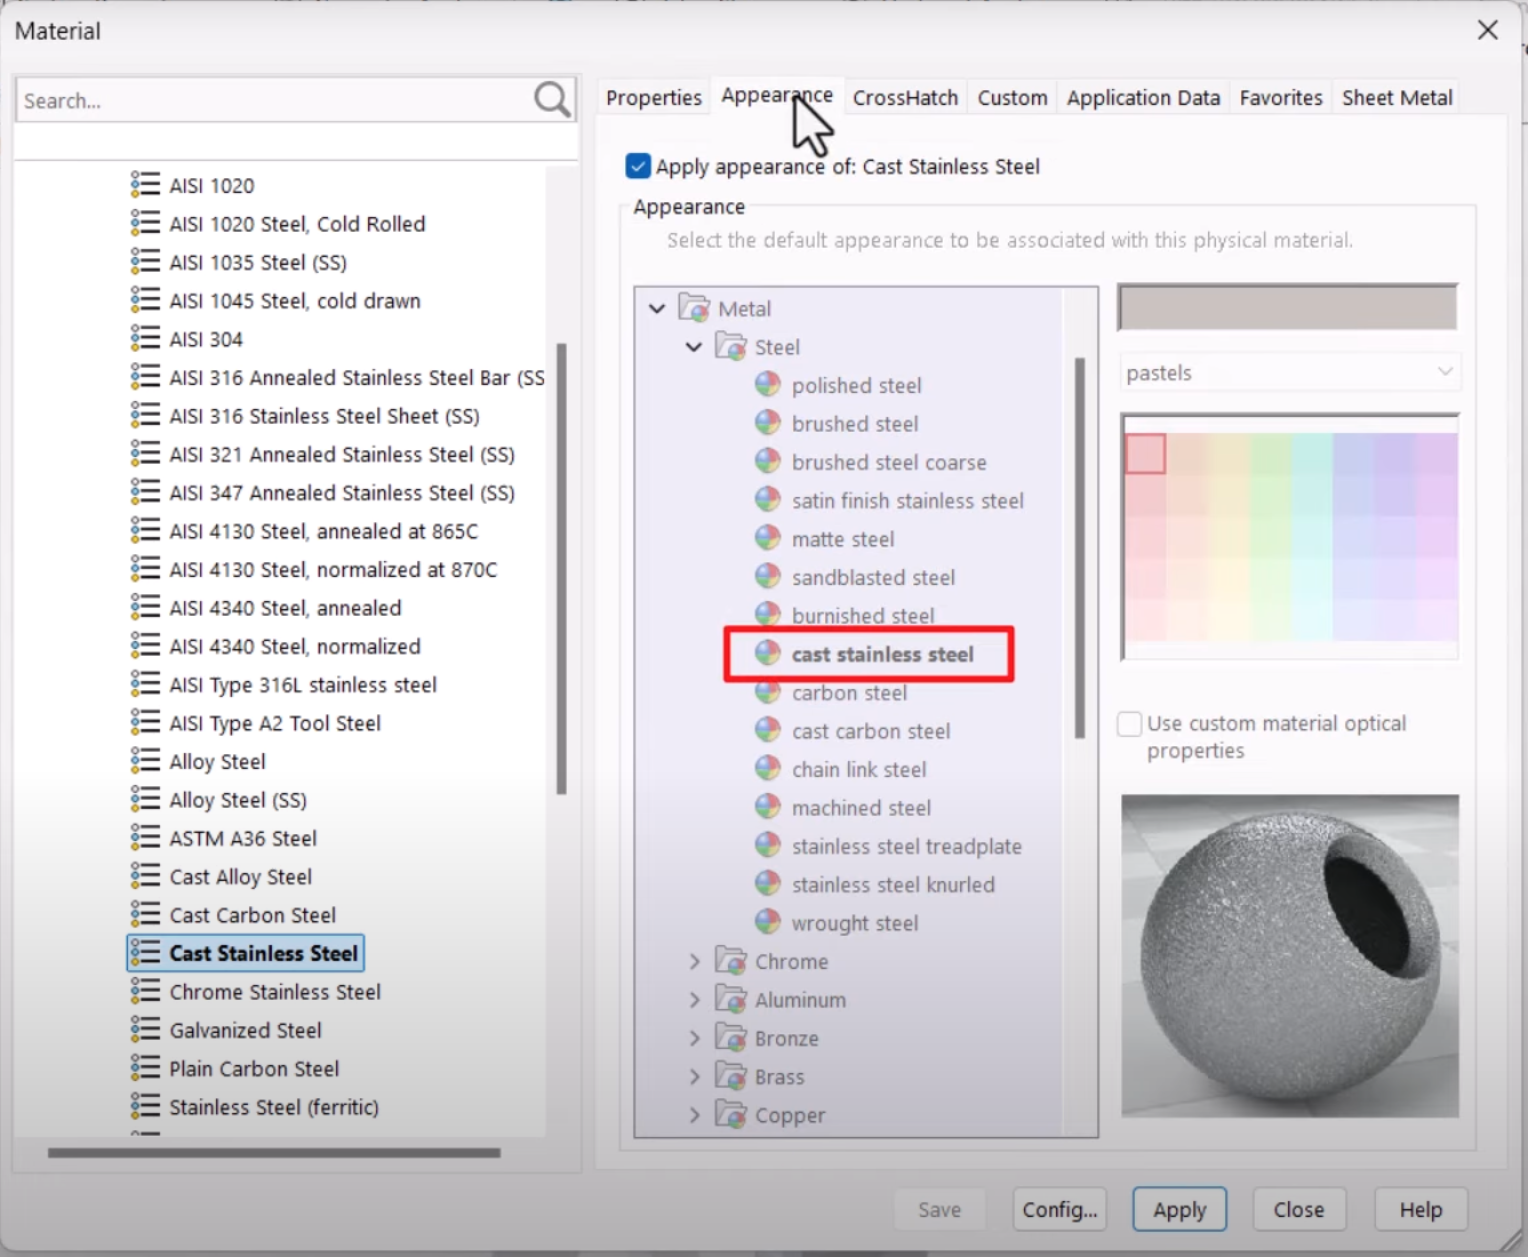
The Core Choices: Colours, Appearances, Materials
Before you start adjusting lighting or running high-quality renders, it’s worth mastering the three basic controls that shape how a model looks in SOLIDWORKS, which are Colour, Appearance, and Material. Each affects the model in a different way, from simple cosmetic changes to fully defining how it behaves in simulations. Understanding these options will help you choose the right one for the stage of your design and the message you want to convey.
- Colour – A simple shade from a swatch. Great for quick visual changes without textures or properties. This is particularly useful for highlighting features, distinguishing parts in an assembly, or presenting early design concepts, without adding texture or physical properties.
- Appearance – Combines colour with texture for a more realistic look, such as brushed steel, wood grain, or plastic patterns. This is great for presenting designs, showing surface details, and distinguishing parts visually.
- Material – Includes both the visual style and physical properties used in calculations across the SOLIDWORKS ecosystem.
These settings can be combined with the RealView Graphics settings, which can give realistic textures within the 3D modelling environment.
Why Choosing the Right Materials Matters in SOLIDWORKS
Assigning a material in SOLIDWORKS does more than change how a part looks. It links your model to the physical properties of the real-world component.
With the right material applied, SOLIDWORKS can:
- Calculate accurate weight and mass based on density.
- Use mechanical and thermal properties for reliable simulation results.
- Display the correct material specification on drawings and documentation.
- Give a realistic finish for presentations and renders.
Without a defined material, your model might look fine on screen but lack the data needed for manufacturing and performance checks. By assigning materials, you’re making sure your design is ready for both analysis and production.
In this short video from the SOLIDWORKS training team, Fred Koehler explains the differences and shows exactly how to apply each option.The video also covers how these can be applied to whole parts or individual faces, how to override appearances, and where to find and manage them in the DisplayManager.
Enhancing your 3D models in SOLIDWORKS
Once you’ve set your model’s colour, appearance, or material, you can bring it to life by adding depth, light, and context. There are lots of visualisation features in SOLIDWORKS let you do that without needing a full render.
Ambient Occlusion
Ambient Occlusion adds soft, realistic shadows where surfaces meet. This makes edges and curves stand out, giving the model a more three-dimensional feel on screen. This is a global setting and so changes will impact all models on the same screen. To use this feature, you will need a graphics card that supports RealView Graphics display.
You can turn Ambient Occlusion on by
- Clicking View Settings or clicking View > Display, then click RealView Graphics.
- Clicking View Settings or clicking View > Display, then click Ambient Occlusion.
Decals
This feature allows you to apply images directly to model surfaces. This is ideal for adding product labels, logos, control panel graphics, or patterned finishes without having to model them.
Decal controls can be found in the Task Pane, by selecting the Appearances, Scenes, and Decals tab.
Lighting
In SOLIDWORKS, you can control the direction, intensity, and colour of light in the shaded view, as well as add different types of light sources to suit your design. Ambient light provides even illumination from all directions, directional light mimics parallel rays from a distant source like the sun, point light radiates in all directions from a specific location, and spot light produces a focused cone-shaped beam aimed at a chosen area. Adjusting these settings allows you to highlight features or create the desired visual effect for your model.
You can control lighting through the Scene, Lights, and Cameras in the DisplayManager.
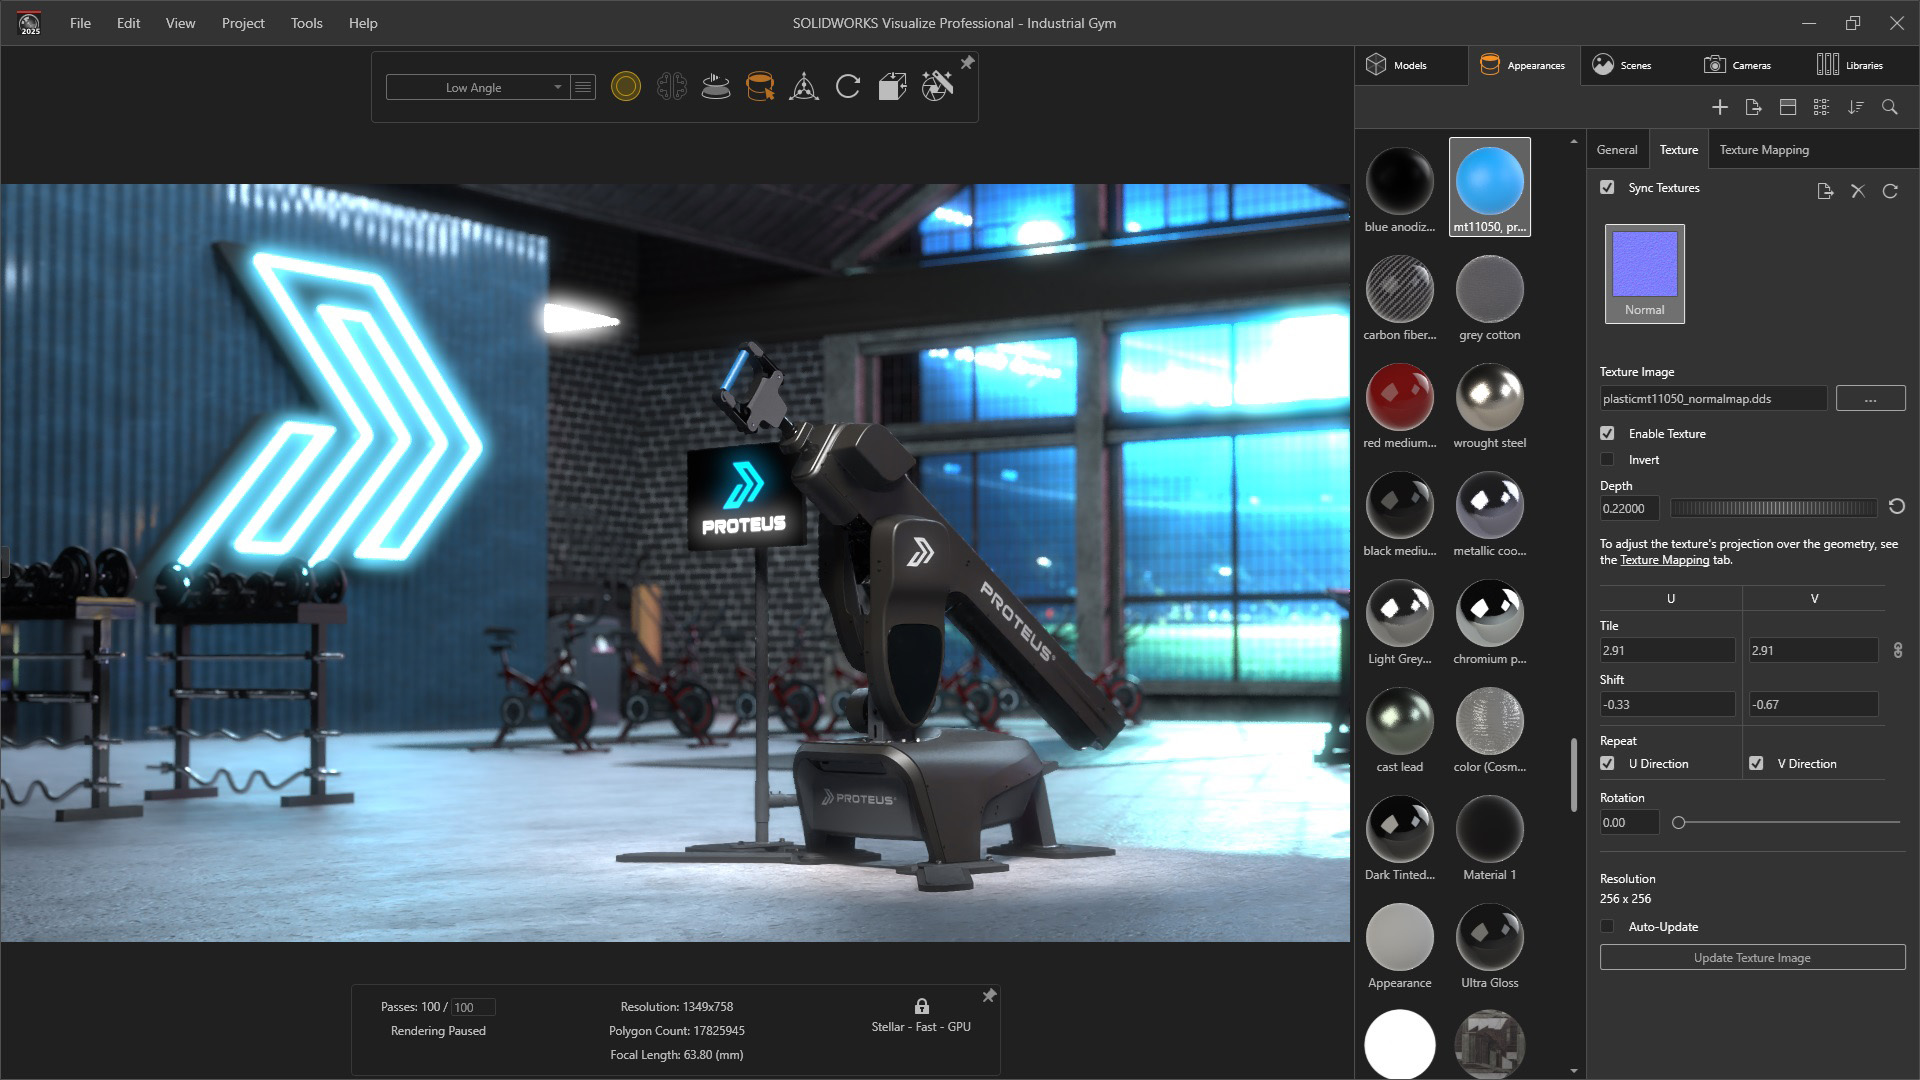
SOLIDWORKS Visualize – Photorealistic Renders and Animations
While SOLIDWORKS’ built-in display tools can make models look impressive, SOLIDWORKS Visualize takes presentation to another level. It’s a separate application designed to create photorealistic images, animations, and interactive content directly from your SOLIDWORKS models. SOLIDWORKS Visualize comes with SOLIDWORKS Professional and SOLIDWORKS Premium packages.
SOLIDWORKS Visualize creates stunning images by simulating how light interacts with surfaces. This creates results that look like professional product photography and videography. Although the default settings are fantastic, SOLIDWORKS Visualize gives you lots of creative control. You can easily change small details like material finishes and surface imperfections, up to big changes like lighting setups and background environments. This means you can create customer-ready images and videos without waiting for a physical prototype.
Key advantages include:
- Physically Based Raytracing – SOLIDWORKS Visualize uses NVIDIA’s Iray® render engine to create a realistic and physically correct render of their CAD model.
- Intuitive User Interface – SOLIDWORKS Visualize lets users work like they would in a photo studio, moving the camera around their product and easily “taking pictures” of their CAD data. It’s quick to learn whether you’ve had lots of previous experience in other programs or no rendering experience at all.
- Photorealistic quality – Materials, reflections, and lighting behave just as they would in real life. The aim of the Vizualise is to give a result that’s as close to the factory-finished product as possible.
- Custom environments – Place your model in real-world backgrounds or studio-style setups. This helps to see your product in-situ or create marketing materials to show customers.
- Animations – Show products in motion, including exploded views, part rotations, and camera fly-throughs. The interface offers lots of control over the lighting, frame rates and other details to get the most out of your videos.
- Consistent branding – Easily apply your company’s colours, logos, and presentation style to the renders for client-ready visuals.
- Support for 25+ CAD File Formats – Users can import over 25 different CAD file formats, including common generic formats such as IGES, STEP and OBJ into SOLIDWORKS Visualize.
For design reviews, client proposals, or promotional content, SOLIDWORKS Visualize can turn a technical model into a presentation that communicates ideas clearly and impressively.
Ready to get started? Buy SOLIDWORKS today or contact us to request a quote.