V-Ray is a go-to rendering plugin for many architects and interior designers. It brings stunning realism to 3D models quickly and easily. While the “Out-of-the-box” settings bring incredible results, there are a couple of techniques to get even more out of your renderers.
In this blog post, we will go over two advanced settings inside of V-Ray, plus touch on some key terminology and skills that apply to any software you plan to render.
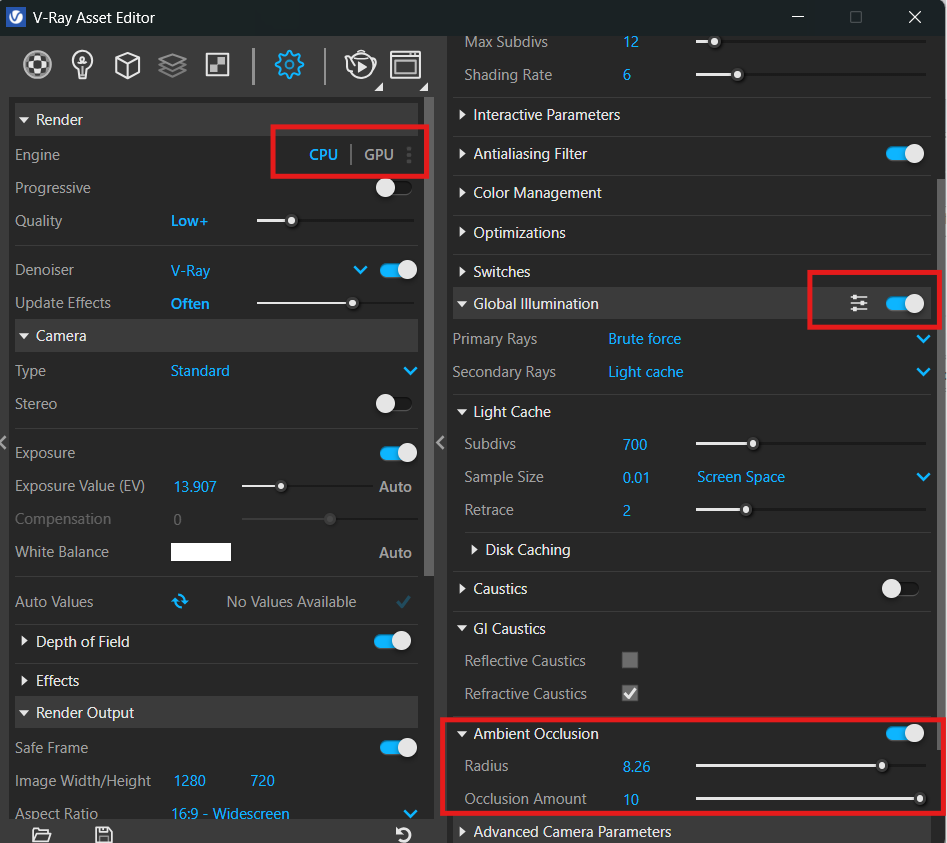
Ambient Occlusion (AO)
Ambient Occlusion is the ability to add strong shadows in the corner of objects or at the point where two objects meet. This could be where a pillow sits on a chair and the shade on the bottom of the pillow or perhaps in the corner of an overhang on a building.
Below are a few screenshots to better explain what just turning this setting on will do; just know this is turned up to better demonstrate the effect, whereas you may want to turn down the settings for that realistic look.
In V-Ray, the ambient occlusion setting is found under ‘Global Illumination’ in the advanced options when rendering using your CPU. For GPU rendering, there are more lighting options, but to recreate this specific technique, you will need to look at your materials.
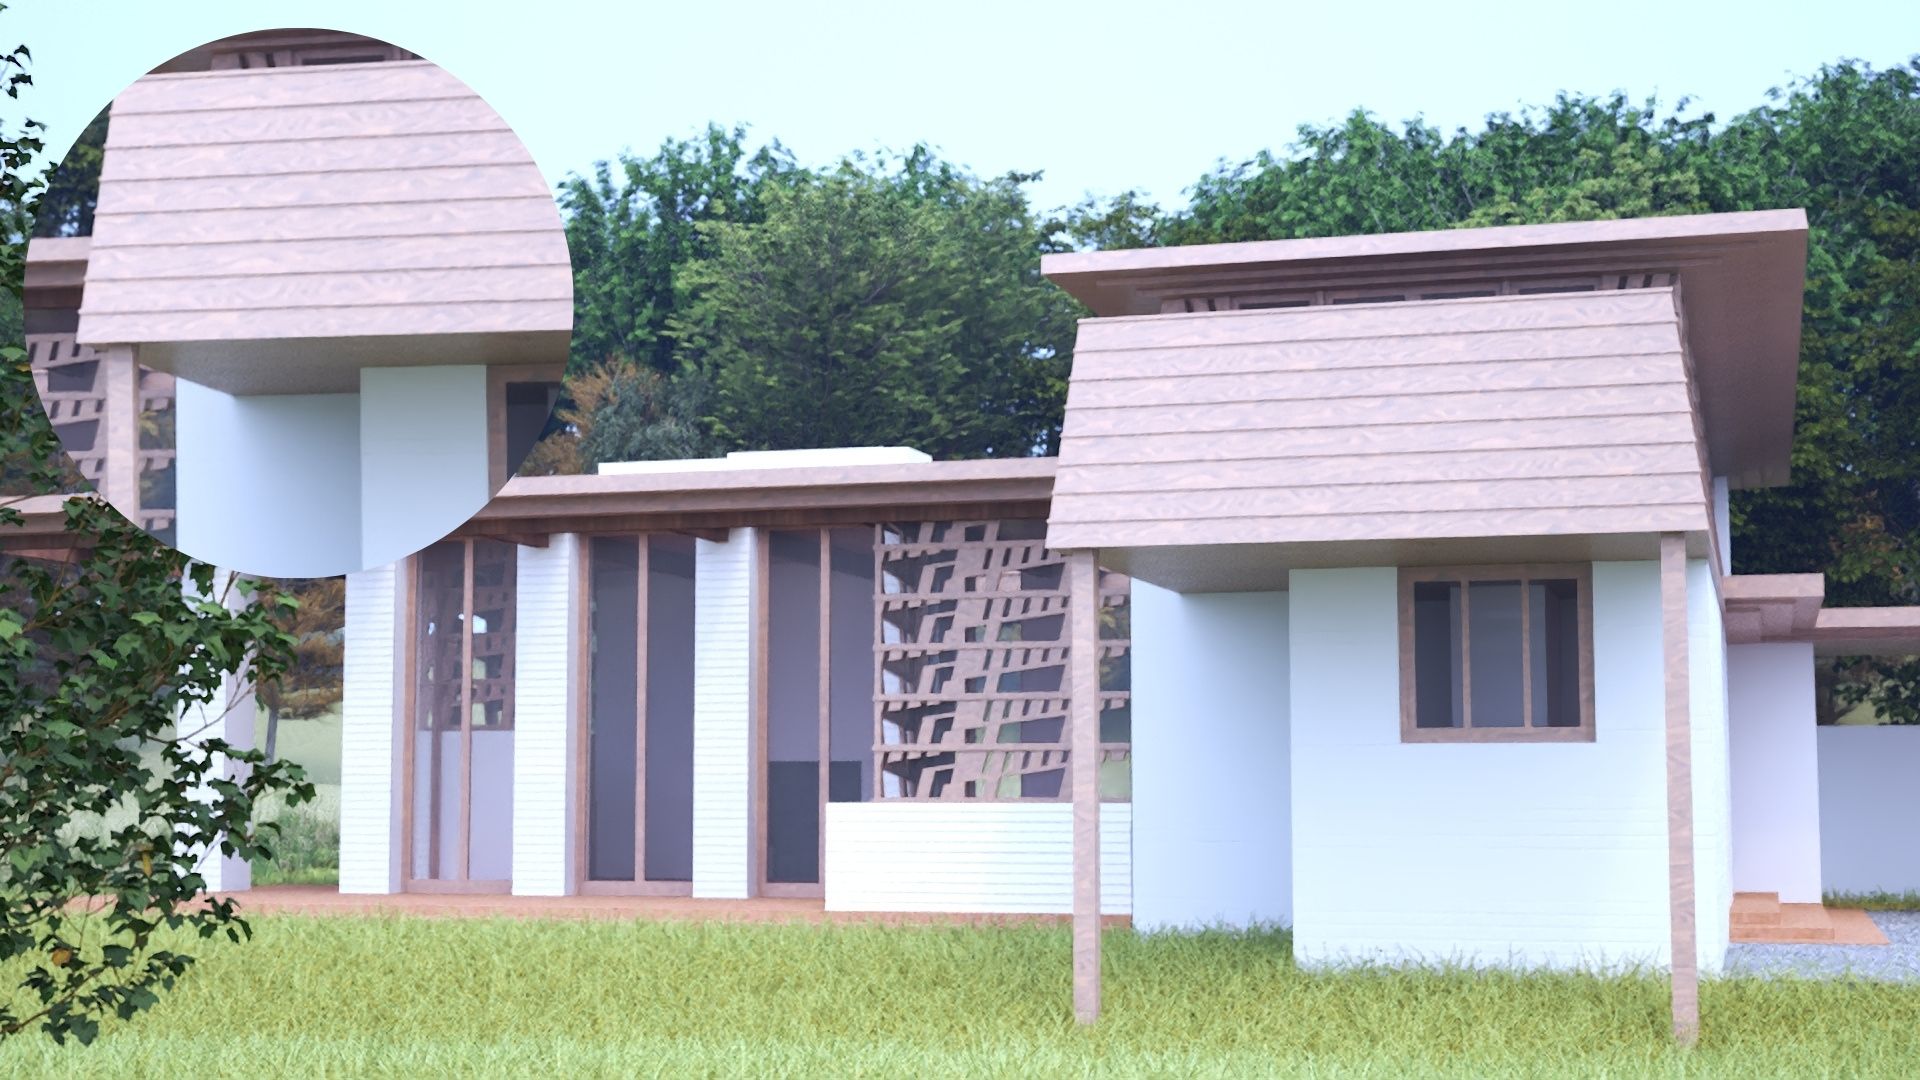
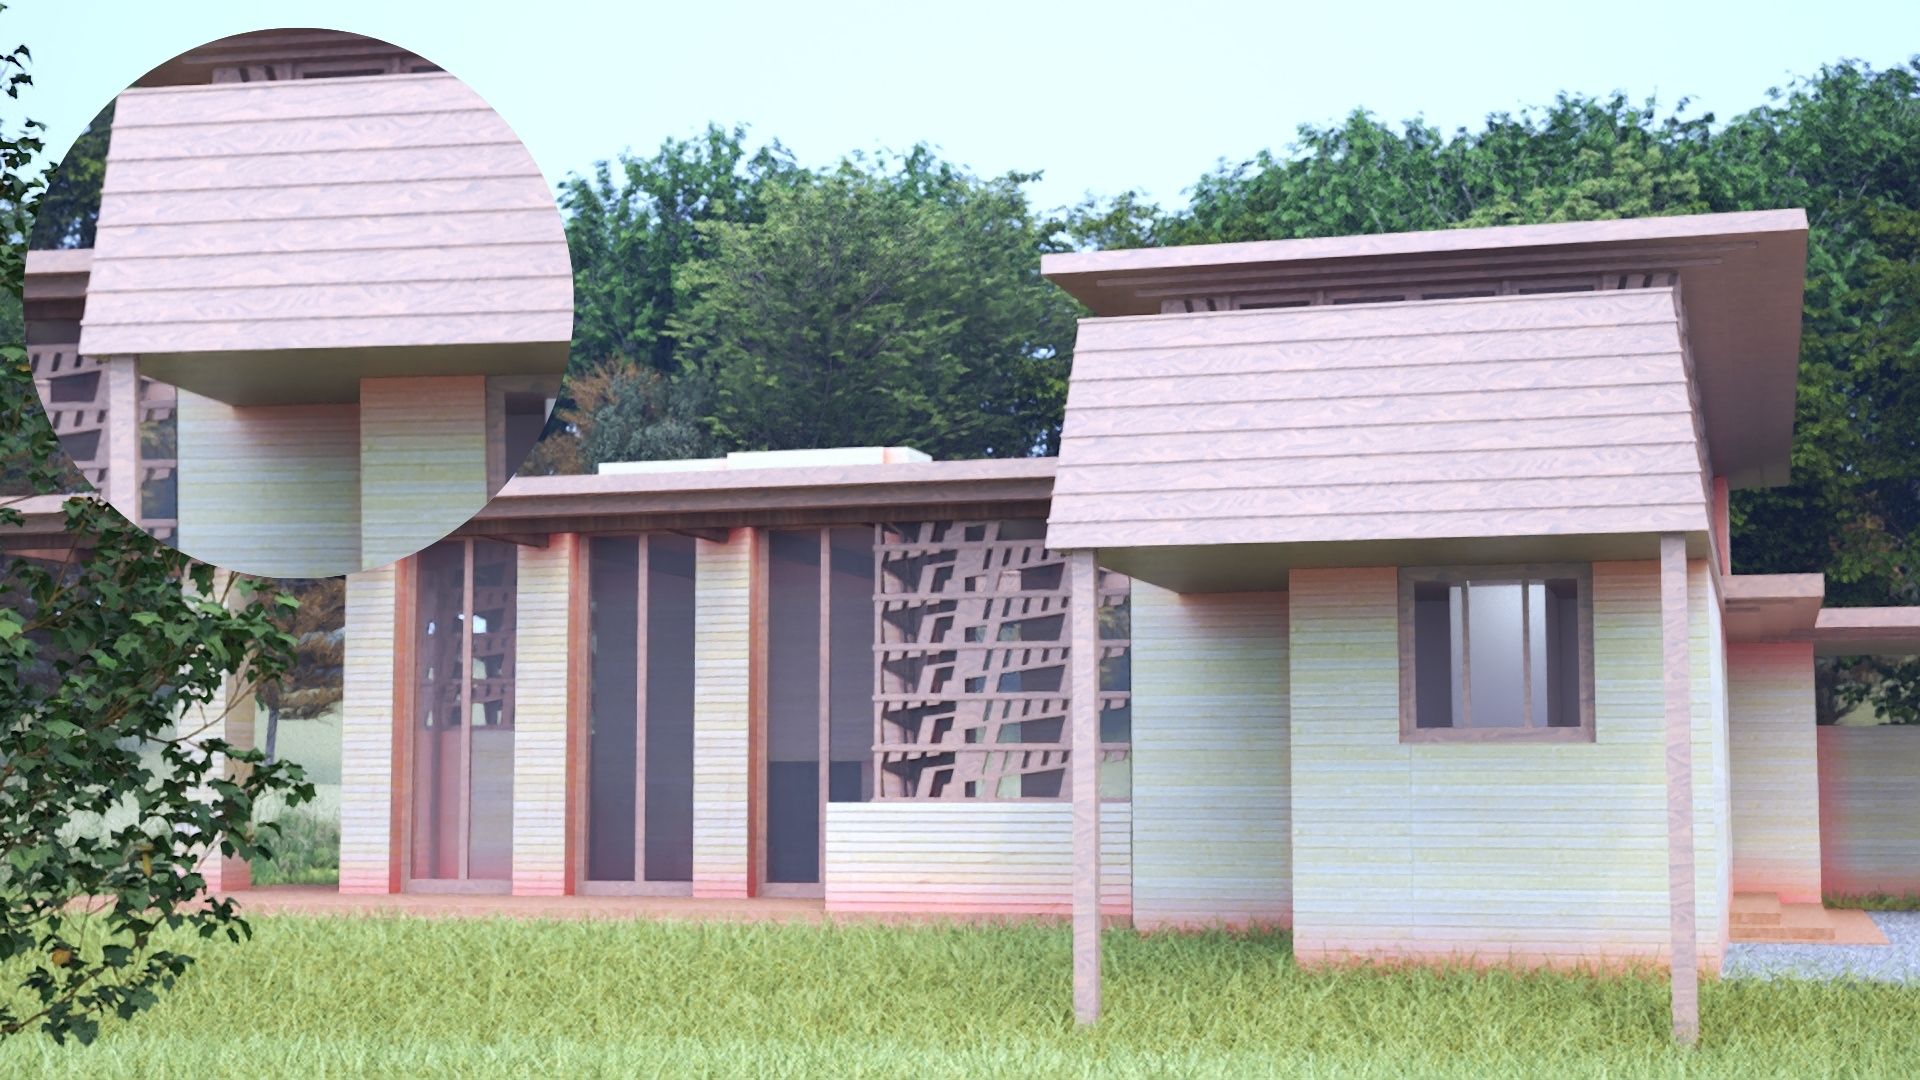
Ambient Occlusion Off
Below is our starter model with Ambient Occlusion turned off. You can see the wood on the roof looks a bit flat, and the wooden pattern on the right of the image is missing a lot of detail with this lighting.
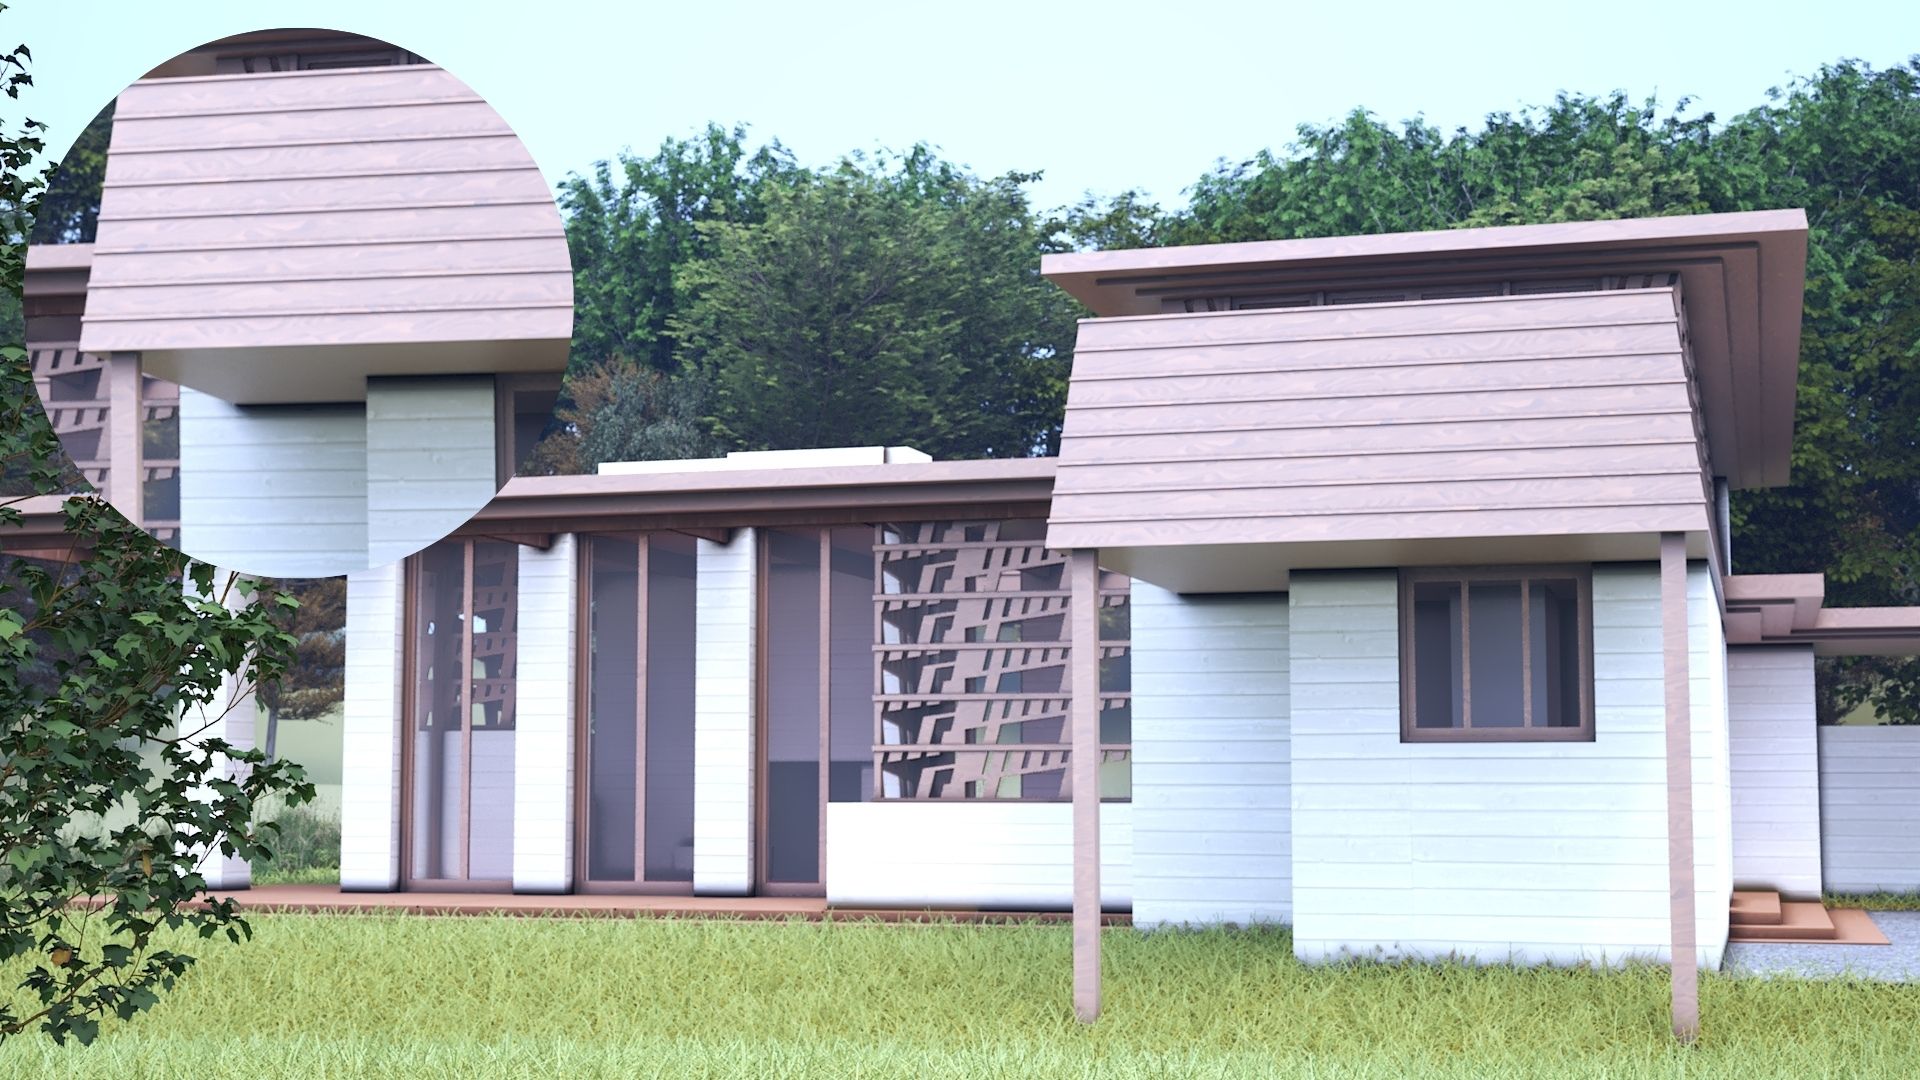
Ambient Occlusion On
I’ve made the shadows quite heavy in this example so you can see the difference. There is more shadow where the roof touches the wall and where the wall touches the ground. These are classic examples of ambient occlusion. Additionally, the ambient occlusion has increased the wood texture on the right of the image.
GPU Ambient Occlusion
GPU AO has a few extra settings. For this example, I’ve turned up the colour so you can see how the ambient occlusion colour settings impact the textures on the house, including around the base of the house and in the corners. It also gives the wood an interesting colour scheme.
While I’ve been very heavy-handed with the colour here, the GPU rendering can help you create subtle shadows that look more realistic than CPU shadows.
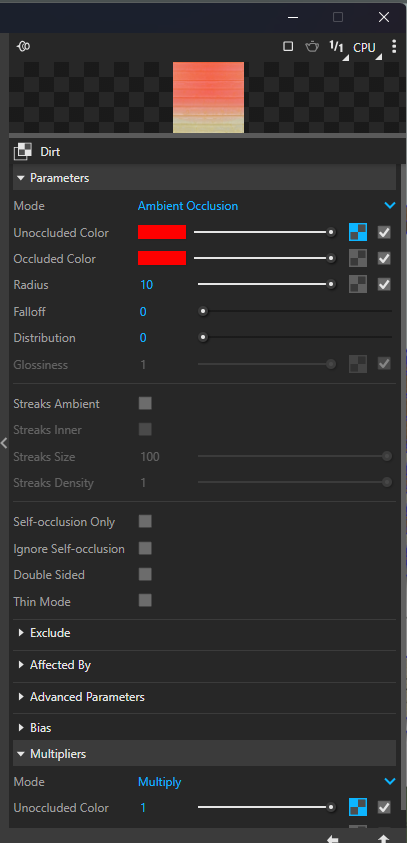
The easiest way to create this effect is to go to your Diffuse > Color, select the checkered box, right-click, and select Wrap in.
Here, we will select dirt. This is a much more subtle version compared to the CPU counterpart. In the screenshot below, I made the dirt colours red and turned the effects to the max so you can clearly see the difference. There are a lot of settings within this dirt map, so make sure to have a play, but to begin with, just put it on and focus on the first few settings.
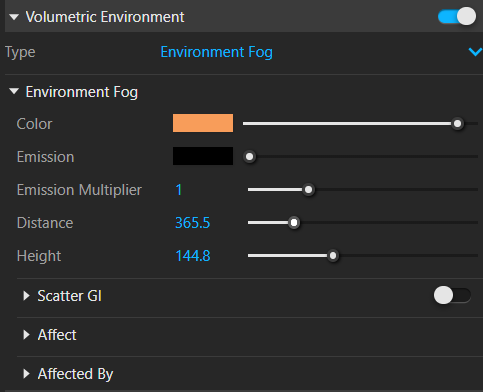
Volumetric Fog
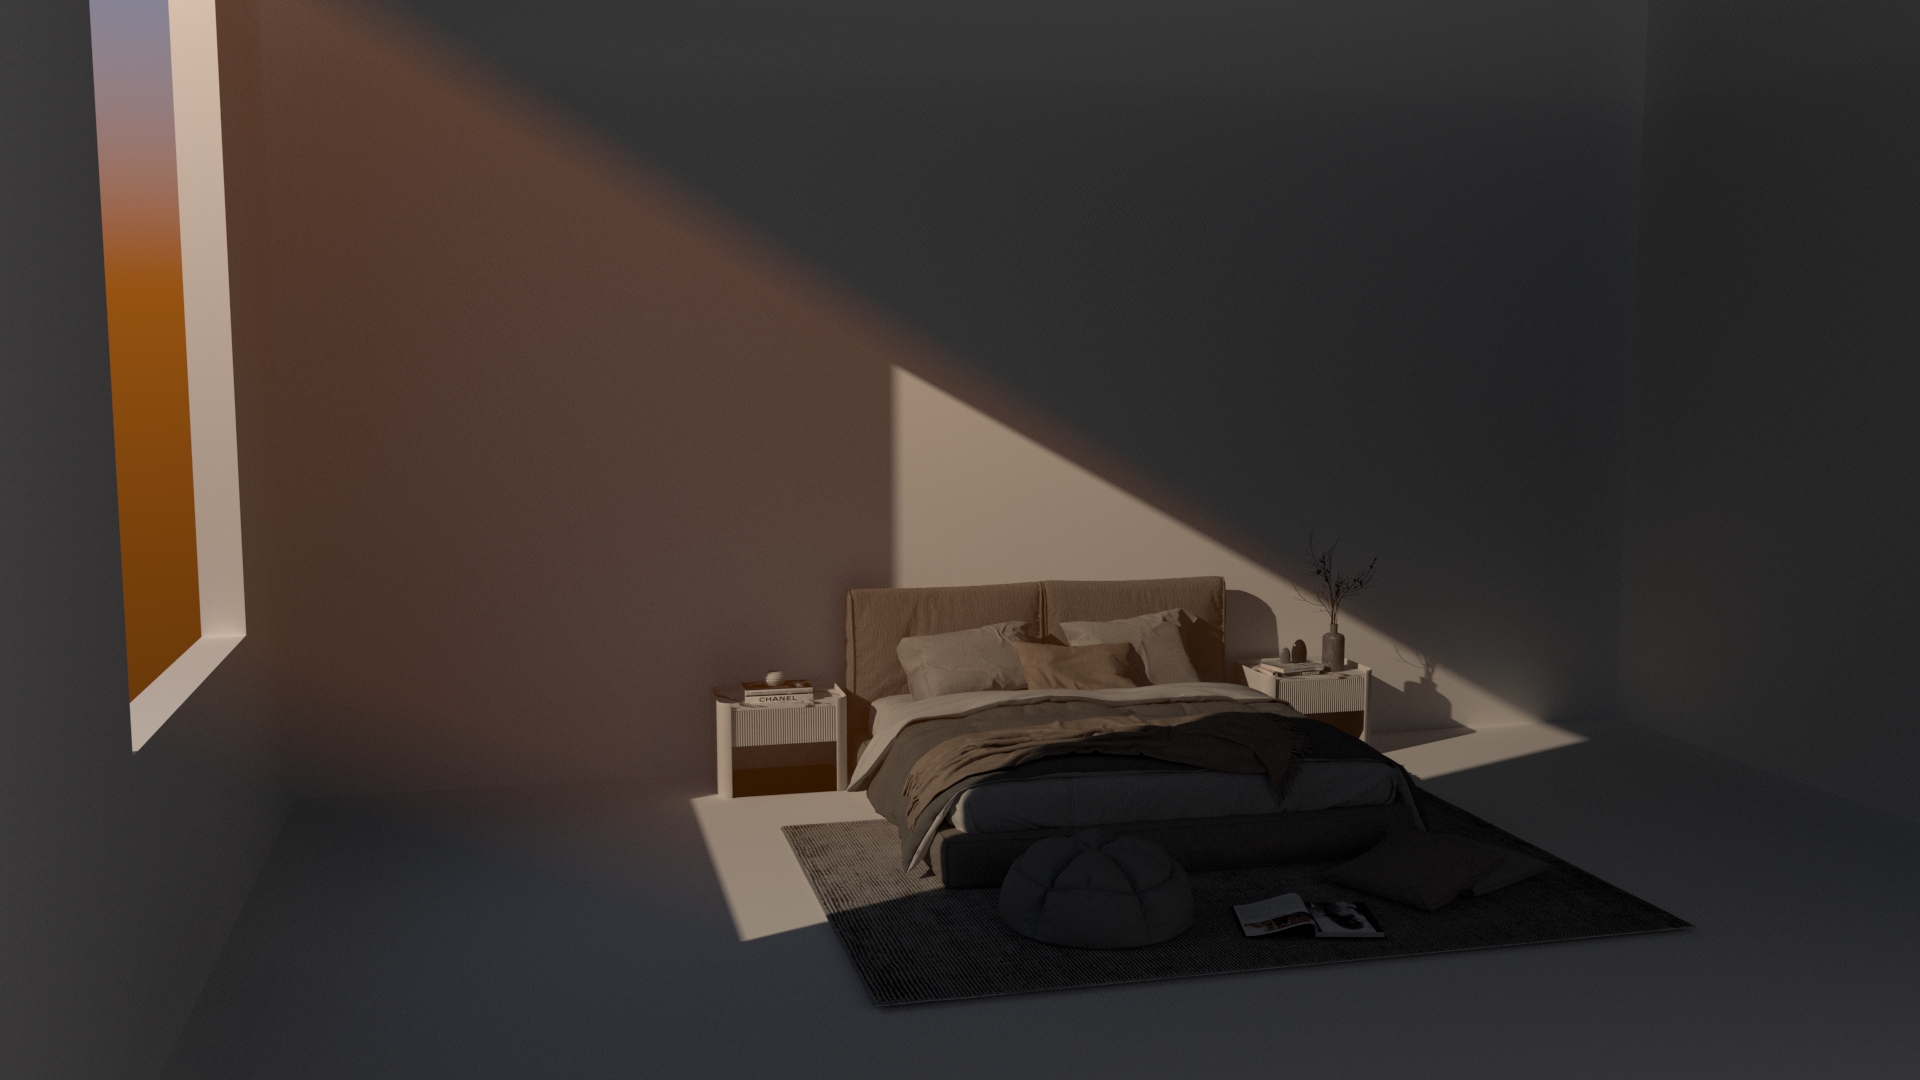
This is also known as ‘Crepuscular rays’ or more commonly known as ‘God/angel rays’. Volumetric fog allows light in scenes to be seen and interact with fog or particles, such as dust, to create the effect.
The point is to again add that extra layer of depth and realism to your scene, but it can also add atmosphere to tell a story with your outputs. Volumetric fog works much better with an interior scene, as seen below.
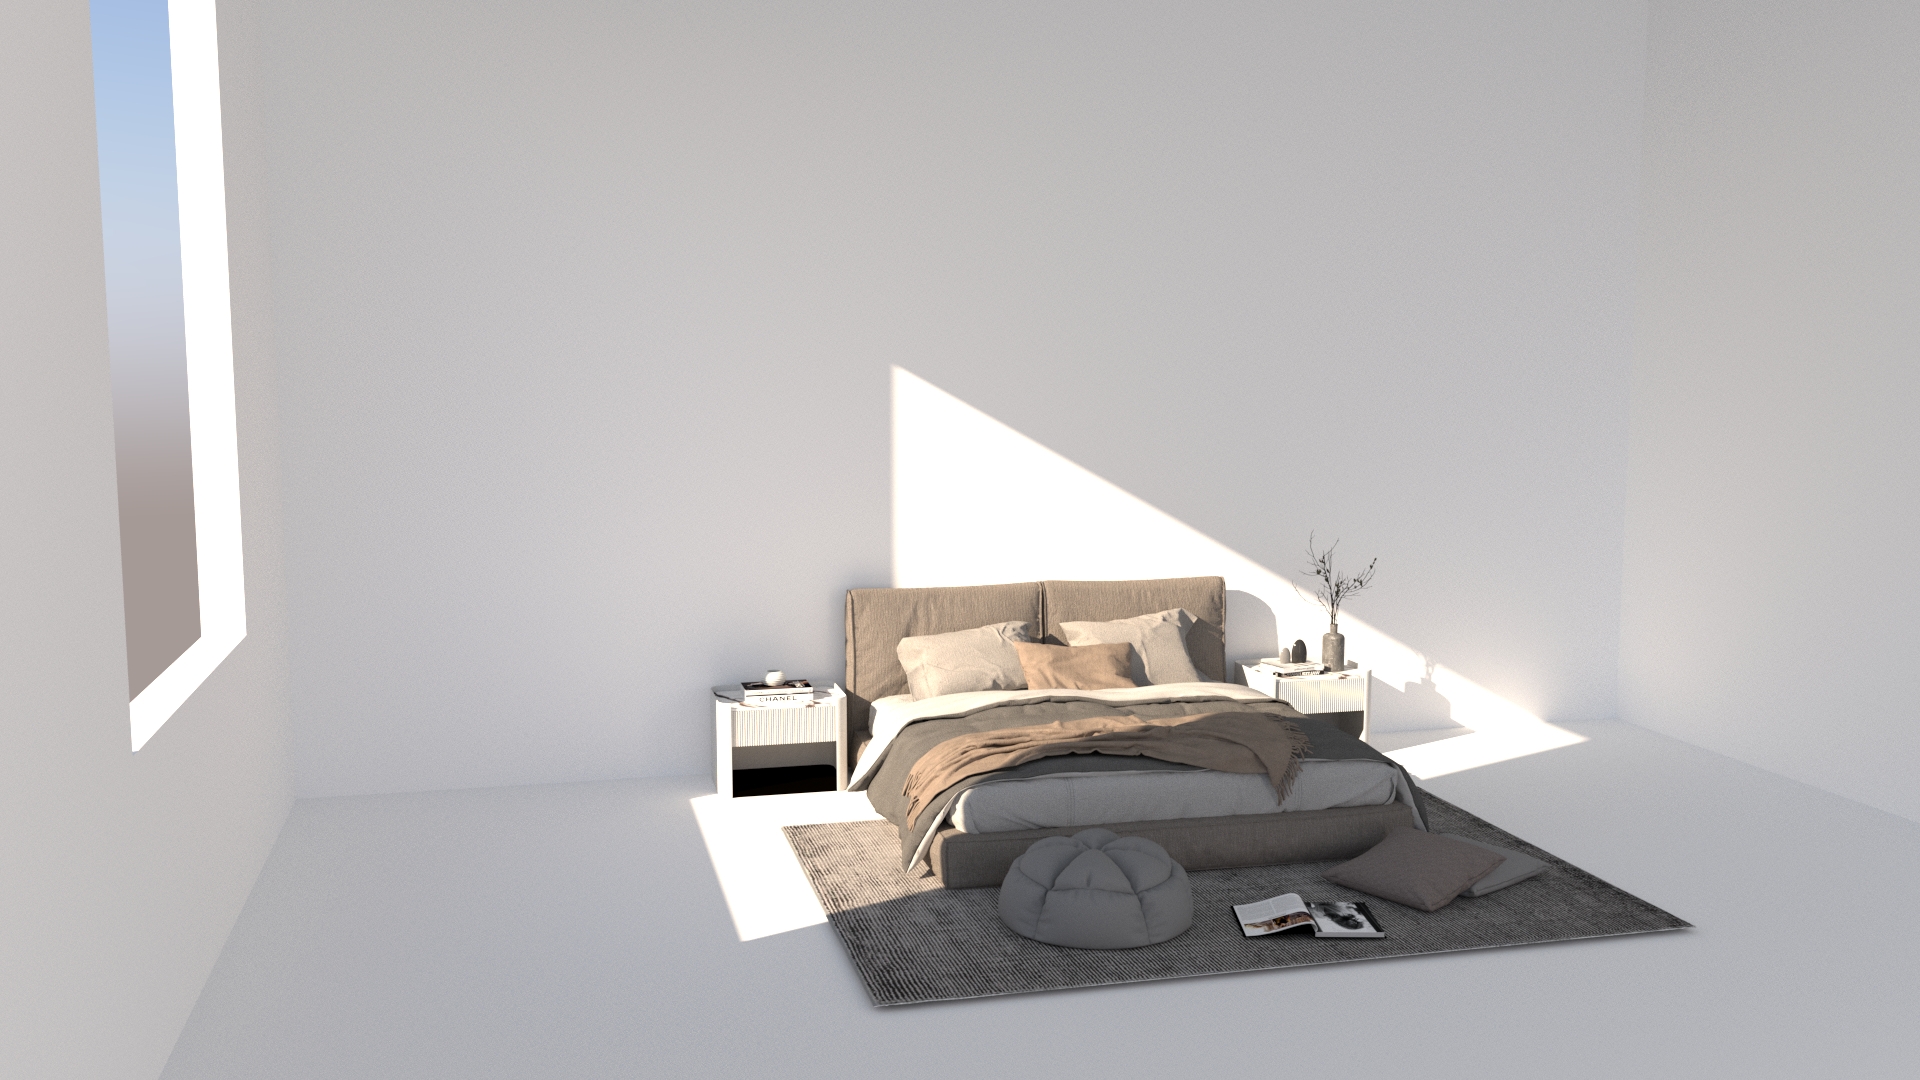
If you just switch this on, you might not get these effects, but you will notice the lighting change, and also, the shadows are much softer and less sharp.
To create full angel rays, you turn on ‘Volumetric Environment’ and switch the type to ‘Environmental fog’. From here, you need to play with the height and distance to get the levels right for your scene. You can also change the colours to give different effects and moods to the scene; white/blue for a moonlit scene or orange for a dusk/dawn effect.