Pixologic recently published another great example of just how important ZBrush is to the design workflow within a live action film and an amazing effects studio. Kevin Hudson talks to Pixologic about how he and his team at Double Negative use ZBrush to create the fantastic characters in the recent sci-fi fantasy film, John Carter.
How did you come to be involved with the John Carter project? What was your role in the production?
I was recruited by Double Negative Visual Effects in London from Los Angeles to head up the modeling effort on this major Character piece. To date, it was the largest project they’d tackled. While in California, I first tried out ZBrush while working on Ghost Rider. I expanded its use to build the sixteen Zombie creatures for I Am Legend. I then used it to sculpt Dr. Manhattan for Watchman. But with over forty characters, John Carter was going to be the largest scale ZBrush character project that I’d ever attempted. It was also going to be Andrew Stanton’s first foray into live action film making, which meant we had to do an outstanding job.
What was the overall pipeline for your work on this project?
We received ZTools of character concept sculpts from Legacy Effects that had been developed with Andrew Stanton in California. We then took these and retopologized them in Maya using some basic Maya shrinkwrapping tools. I don’t use anything tricky for my retopologizing, but use Maya’s World Space Transfer Attributes tool to shrinkwrap my retopologized model onto the concept sculpt.
We then used ZBrush’s Projection tools to extract as much data as possible from the initial concept sculpt. The model was then reposed into a more standard pose and we began resculpting with an eye for preserving as much of the concept sculpt’s intentions as possible. Everyone would have a say at this point and often revisions to the anatomy to better serve rigging would be done.
We also made modifications to proportions based on animation tests using the basic model. All of this would lead us towards our final production models and sculpts.
ZBrush did a great job when reprojecting new topology onto our sculpts over the many generations of revisions throughout the show. I found that by taking the Blur setting down to 1 we preserved a lot of good detail. Andrew, who had spent a lot of time with Scott Patton at Legacy Effects, was very much in love with his characters and was always there to smack us if we varied too much from the original concept.
Was ZBrush used for environments at all?
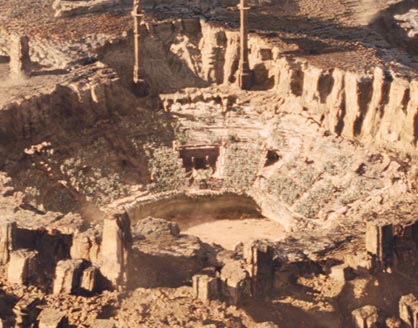
The Environment team — headed by Guy Williams — also used ZBrush to touch up all the environments to give the stone a weathered and chipped look. They built intact structures, then used the Clipping brush to chip and flatten sections in order to make them appear old and broken. These chunks were then retoplogized before more subtle weathering was done.
What character posed the greatest challenge for you?
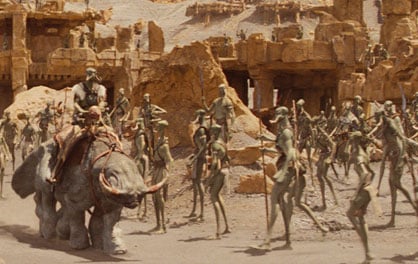
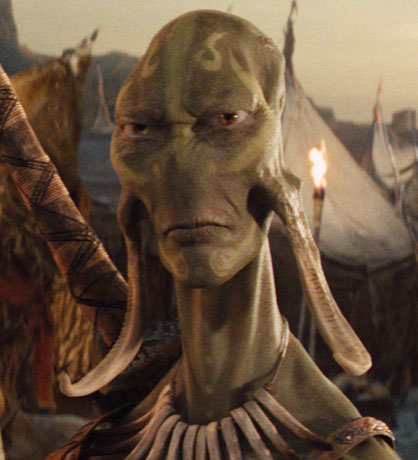
Tars was the biggest challenge and a lot of modelers all had an impact on Tars. He is on screen a lot, and there was a lot of talk about the character looking like Willem Dafoe, or at least his essence. We did a lot of exploration on how much it should look like Willem Dafoe — at one point we did a reworking of Tars to incorporate a lot of Willem Dafoe’s facial characteristics. This was often refered to as the “Eleven” version. Ultimately, we backed off from this almost completely and returned to the original concept.
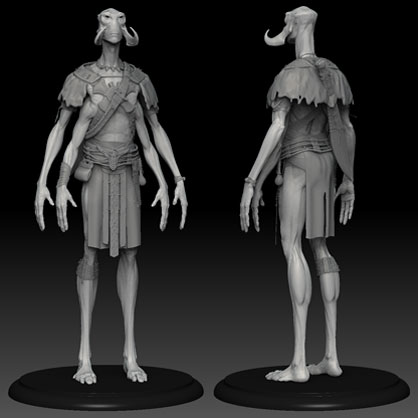
In the film industry, this process of coming back to the original concept isn’t uncommon. Sometimes, the director needs to explore all the variations to confirm that the original inspiration was the best. Or at least, what they really wanted.
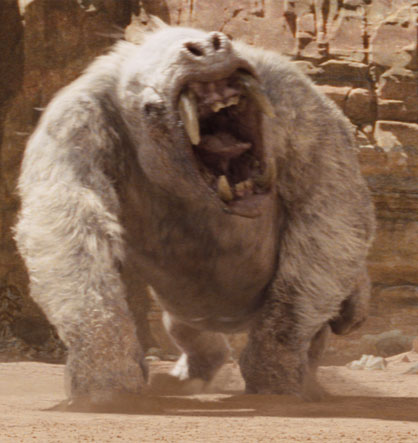
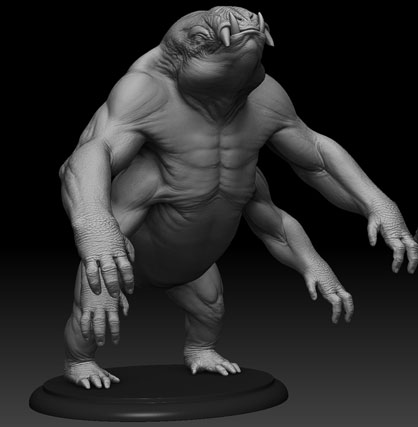
The White Apes were a technically challenging character because of their size and ZBrush poly count. I really took ZBrush to the limit and ultimately had to break the model up into separate UDIM pieces in order to export the displacement maps. For the most part, all of the characters were able to be exported using the Multi Map Exporter from ZBrush, but because of the high poly count on the Apes we couldn’t do this. I used the Group UV tool to create separate groups for each of the UDIM tiles. I then then used the Groups Split tool to break the White Ape mesh up into separate SubTools. Even with splitting the model up, it was a challenge exporting the maps, as I maxed out the RAM on my machine.
To read the full interview in detail click here.